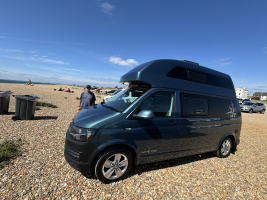
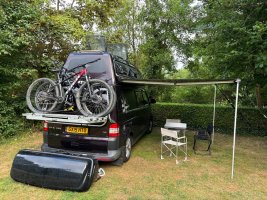
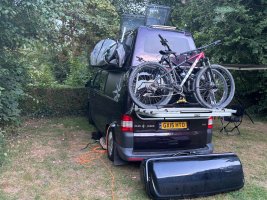
Custom build - 2020 Westfalia Club Joker 4Motion - Offroad build thread

Another amazing option if you are going through the Gothard to Italy is to take a 30 minute detour and go up the Furka Pass and stay the night above the roads in the Alpine farming area called Albert-Heim-Hütte near Tiefenbach. It’s a gravel road that costs 10Chf for 24 hours (fine with or without 4motion). Go up and keep going past the first parking area for another 200-400 meters. Find a nice patch of grass with a fire pit to park up at the top of the world. Was there a few days ago.
be125bb632f1d8516c56d99259d3e8ab.jpg


Sent from my iPhone using Tapatalk
I think I know this from my old motorbikes days... isnt there a sign limiting access beyond the car park without an access permit? Or has it changed?

This is the triefenbach car park and go on a little bit correct ?
 
Last edited:
I think I know this from my old motorbikes days... isnt there a sign limiting access beyond the car park without an access permit? Or has it changed?

This is the triefenbach car park and go on a little bit correct ?

There is a 10Chf fee for 24 hours. About 200 meters up from the main road there is a parking meter that you can pay with coins or an app. After that you are good to go for all the alpine farming roads above.

I initially discovered this place using the app Wikiloc which is great for finding off-road paths that are legal in Switzerland (which are hard to find).


Sent from my iPhone using Tapatalk
 
To be installed:

- Goldschmidt OmniRoad Air Suspension with +35mm lift
- Hess underbody protection motor and differential
- Lazer LED's in front grill integrated with CAN bus and high beams
- Victron 2000 Inverter, 170w solar, 200AH Lithium batteries with all original AC outlets wired to inverter
- 5G router with antenna boost
Hi I have just bought the same base vehicle as yours (even the same colour!)
I am looking to fit solar panels and an inverter to begin with.
roof space is a bit tight for solar and under front seats currently have 2x 95ah lead acid batteries.
can you tell me what make of solar you used and where you put them and where you put the lithium batteries inverter and controllers - thanks photos would be great. Love what you have done to yours!

tempImage75OXaY.png
 
Hi I have just bought the same base vehicle as yours (even the same colour!)
I am looking to fit solar panels and an inverter to begin with.
roof space is a bit tight for solar and under front seats currently have 2x 95ah lead acid batteries.
can you tell me what make of solar you used and where you put them and where you put the lithium batteries inverter and controllers - thanks photos would be great. Love what you have done to yours!

View attachment 127873

Congratulations! I suggest you read through my thread in reverse order (newest posts first) as my build evolved over time. I pushed my installer to the limit of what was possible.

I now have 300 watts fixed with 2 on the roof and one on the back of the high roof. It’s easier to fit 85 watt panels for a total of 170 watts on the roof. The only way to go larger is to use CIGS panels as they are very very flexible in multiple directions. They are also superior with shading and cloudy conditions as they have 48 bypass diodes per 100w panel. See my thread and let me know what questions you have.


Sent from my iPhone using Tapatalk
 
I didn’t realise you could get the Joker as 4motion and with the 204 engine.
Nice van

Jokers everywhere!
There’s now two 2nd hand bamboo green 4motions (only one in that pic couldn’t get the other green one in different spot) for sale at campersales.
It’s not on there website yet, arrived when I was there for solar measure up.
That’s it next to mine.
View attachment 94667
is that at Harbour Creek? I now own the green one in the picture!
What solar did you have fitted and who did it?

Thanks
 
Congratulations! I suggest you read through my thread in reverse order (newest posts first) as my build evolved over time. I pushed my installer to the limit of what was possible.

I now have 300 watts fixed with 2 on the roof and one on the back of the high roof. It’s easier to fit 85 watt panels for a total of 170 watts on the roof. The only way to go larger is to use CIGS panels as they are very very flexible in multiple directions. They are also superior with shading and cloudy conditions as they have 48 bypass diodes per 100w panel. See my thread and let me know what questions you have.


Sent from my iPhone using Tapatalk
Thanks will do
 
Thanks will do
These are the original 85w panels that I had when I did the build. They fit perfectly on the roof. One if front of the front roof vent and one inbetween the front and rear roof vent. This will give you 170 watts and you won't even see the panels from the street looking at the roof. A single Victron 20A MPPT (15A could also work) would be just fine:


And here are the updated solar panels I installed based on CIGS. I had to ship this via my freight forwarder from the US, but they also sell or have distribution from Germany (out of stock when I wanted them):


Note, these were a bit tricky to install as the front panel needs to be orientated front to rear in front of the front roof vent. The front most part of this will then follow the curves both front to back and side to side. It required some finesse to mount with the included adhesive tape, sikaflex, and finally some weather resistant "super glue" for the extreme edges to keep them down on the roof. But in the end it works very well.
 
Just upgraded my upper mattress to a new Fanello 7.5cm custom built "click mat". Super pleased! I had been using a mattress topper but it was a bit of a faff and took up storage space. I'll take some photos once I can (van is at the body shop getting some touch ups this week). Essentially the front most section of the mattress is 2 pieces. One is 5cm and another 2.5cm. I can slide the 2.5cm piece forward so that I can slide the entire mattress forward in it's stowed position. Super comfortable sleep!!!
 
Anyone know the best fitting storm straps for the Joker awning? Had to resort to DIY bodge to get my old Thule ones to fit - looks like Fiamma ones might be a better fit as they use the kador slot on the front edge?

(Normally use the magnetic feet when not fully extended)
 
Anyone know the best fitting storm straps for the Joker awning? Had to resort to DIY bodge to get my old Thule ones to fit - looks like Fiamma ones might be a better fit as they use the kador slot on the front edge?

(Normally use the magnetic feet when not fully extended)

Interesting. I have Thule storm straps but they are still sitting in the box and unused!


Sent from my iPhone using Tapatalk
 
Anyone know the best fitting storm straps for the Joker awning? Had to resort to DIY bodge to get my old Thule ones to fit - looks like Fiamma ones might be a better fit as they use the kador slot on the front edge?

(Normally use the magnetic feet when not fully extended)

I have the magnetic feet too which I use more often thannot on my Cali. I did make my own tie down straps from some climbing cord, a couple of carabiners on one end to attach to the awning and a slip knot on the other end for pegs. About £10 all-in from Go Outdoors and easier to pack and more versatile than the Thule or Fiamma versions. I couldn’t be doing with all that flappy straps business on the Thule one so I sold it.


Sent from my iPhone using Tapatalk
 
Anyone know the best fitting storm straps for the Joker awning? Had to resort to DIY bodge to get my old Thule ones to fit - looks like Fiamma ones might be a better fit as they use the kador slot on the front edge?

(Normally use the magnetic feet when not fully extended)

Update - FIAMMA storm straps fit perfectly into the kador slot.

(…old Thule ones will be up for sale shortly!)
 
Update - FIAMMA storm straps fit perfectly into the kador slot.

(…old Thule ones will be up for sale shortly!)

Good to know! Thank you. I now have my unboxed Thule storm straps to sell then.


Sent from my iPhone using Tapatalk
 
Thanks
I have a 2mm Solbian panel for roof so going to be very low profile.
I was just having a little joke with the other guy as he said my joker solar would work better being higher (closer to the sun!).
I’ve got a portable 100w I use now to chase the sun if needed.
Hi can you tell me the sizes of the two Solbian panels you had fitted - I assume in front of the rear sunlight and in front of the front one. Did you have the built in controllers - one for each panel? Thanks
 
Update - FIAMMA storm straps fit perfectly into the kador slot.

(…old Thule ones will be up for sale shortly!)
Can you give more detail on the fiamma storm straps? Thanks
 
Hi can you tell me the sizes of the two Solbian panels you had fitted - I assume in front of the rear sunlight and in front of the front one. Did you have the built in controllers - one for each panel? Thanks
Hi, I don't have Solbian panels. My latest setup is 300 watts fixed with 2*100 watt panels on the roof and a single 100 watt panel on the rear part of the roof. There are photos available in this thread of the rear roof panel but I need to take some photos of the roof panels that I changed to.

On the roof I used BougeRV CIGS panels as they are very durable and flexible and have 48 bypass diodes per panel so handle shading issues very well:


On the rear part of the roof above the tailgate I installed a 100 watt Wattstunde Marine panel as it fits this space perfectly and the cable box is in a good location near the upper part of the roof so out of the way. This panel is ideal in the Winter months when the sun is low on the horizon, or any time of year in early morning and late afternoon.
 
Hi can you tell me the sizes of the two Solbian panels you had fitted - I assume in front of the rear sunlight and in front of the front one. Did you have the built in controllers - one for each panel? Thanks
Info is on here if you look under old posts of mine.
It was one panel between the skylights (mounted over the dip for good airflow). Campersales made frame up for.
Sold van but the few months it was great.

Will say the real game changer is lithium bats just had one 280ah in my self build.
Webbah has lithium solar etc great setup on a joker and very helpful
 
Stunning bus you have built,I’m seriously considering a cj not many around in lhd or rhd the shower and toilet plus not having to drop the roof basically can just move on without much hassle,I love the California roof bed but the cj seems bigger and better for winter, I plan to basically live in mine as I work away a lot and want to travel as much as I can in the next few years any negatives with the vehicle thanks
 
Stunning bus you have built,I’m seriously considering a cj not many around in lhd or rhd the shower and toilet plus not having to drop the roof basically can just move on without much hassle,I love the California roof bed but the cj seems bigger and better for winter, I plan to basically live in mine as I work away a lot and want to travel as much as I can in the next few years any negatives with the vehicle thanks
Thank you! This is exactly why I bought mine and upgraded from a pop top camper. Being able to enjoy every season is awesome. I also work from my van 4-5 days a week. Some will say the negative is a lack of storage but I find that I have even more storage than I did in the boot of a Cali. You just need to be a little more creative. Storage above the cabin for lighter items like bedding and my Projekt Camper window covers, backpack, etc. And next to the toilet I have some storage boxes. I also installed shelving in the taller wardrobe cabinet for folded clothes. Finally you can remove the lower bed (I don't use mine) as it's 4 bolts and easy to remove. Plenty of storage behind and under the bench seat as well. I also installed a storage box on the boot which has a lot of available storage, but in Winter you need to be sure to not store anything that shouldn't freeze.
 
My brakes developed a bit of a squeaky noise when braking at low speed while feathering the brakes. If there is one thing I cannot stand it is noise from brakes. Having put on new rotors and pads fairly recently I decided to pull the pads, clean things up a bit and then use some CRC Brake Quiet on the backplates. This stuff is simply brilliant and has always worked for me in the past. I then used some ceramic brake grease to lube up the brake pad hardware points and reinstalled. Ahhh, perfectly quiet again!

 
Back
Top