Custom build - 2020 Westfalia Club Joker 4Motion - Offroad build thread

A few days ago there was decent sun and I decided to run some tests with my solar setup and a constant load of ~250 watts with my Zero Breeze air conditioner going. The van can get quite hot in the sun and I was curious how my setup would handle this and wanted to present the data in this thread.

Here are the devices I have installed for energy requirements:

- 2 LifePo4 Lithium batteries - 120Ah each for 240Ah total of leisure battery capacity
- Victron MPPT Charge controllers - 2 of them. 1 for my integrated solar and 1 for external solar via MC4 connectors
- Victron Charge Booster 30A - To charge the batteries quickly when the alternator/engine is on
- Victron 1600 watt Multiplus II Compact inverter - With all internal AC sockets rewired directly to the inverter for convenience
- Integrated solar - 2 panels of 85 watts each for a total of 170 watts
- External solar - PowerOak 420S panel with 420 watts when I need more juice

I use a lot of power as I "work from van" instead of working from home. This allows the freedom to choose a nice and different view whenever I want and is the perfect mobile office.

I also prefer to cook, make coffee (Nespresso), charge my Evolve Hadean Bamboo electric skateboard, and all my gadgets like Macbook Pro, iPad, iPhone, etc.

This test was using conducted with my ZeroBreeze AC unit as it uses 250 watts constant on it's highest setting and I could judge how well it will work on those hot/sunny days.

I have apps to view all the devices so let's dive in:

Victron app to view all Victron devices. In addition to those listed in "My Devices" I also have the 1,600. watt inverter but this firmware doesn't support grouping just yet. Ignore the "Eddy" devices as this was another van close to me and in range:

View attachment 98657

The ZeroBreeze is on and at full power as we can see in the inverter:

View attachment 98658

249 watts which is to be expected. It's currently 35C in the highest point of my van when I started the test (quite warm for me):

View attachment 98659


We can see the current output of both my integrated and external solar panels via the Victron app:

View attachment 98663View attachment 98661

I'm currently getting about 320 watts total from both out of a maximum of 590 watts in perfect conditions. Considering there are scattered clouds this is ok for this test.

Looking at the load directly on the batteries (in parallel) show's a different picture as this includes all 12V consumers, of which I am also charging my Macbook Pro, have 4 dashcams, and have the refrigerator set on setting 4:

View attachment 98664

Conclusion: I'm very pleased with this setup! It should be no issue off grid at all and with hot/sunny days I can use my ZeroBreeze AC to cool things down without issue.
Hi Webbah, I love your build thread! I am going to become the proud owner of a 2022 CJ on Friday up from a 2018 4Motion Ocean, my specs are identical to yours on the CJ just a later year, in this post I noticed the EVE on the wall, do you have that wired into your heating system and if yes, how did you do it? Have you found a way to remotely start the heating?
 
Hi Webbah, I love your build thread! I am going to become the proud owner of a 2022 CJ on Friday up from a 2018 4Motion Ocean, my specs are identical to yours on the CJ just a later year, in this post I noticed the EVE on the wall, do you have that wired into your heating system and if yes, how did you do it? Have you found a way to remotely start the heating?

Ha! Nice catch! I actually don’t use that anymore though as I’ve now got a Victron CerboGX and installed 5 Ruuvi tags around the van. These are much more accurate and can be placed in different areas. I’ve got one on the water tank, inside cabin, lower storage shelf in the rear and the rear cabinet. They connect via Bluetooth to the Victron CerboGX so I can have alarms triggered if anything gets close to freezing.

There is a different controller for the Eberspacher Hydronic IIC that you can change to for remote activation but I didn’t want to change from the standard one and don’t really have the need. If it’s a week of sub zero temps I just leave the heater on at 22.5C or so. However I use my van every day and work in it so that might not work for you.

And thank you! It was a ton of work but I’m really happy with the end result.

Although I have a new idea I’m working on with a friend that is a metal worker. He’s making me a custom roof rack to hold 2 solar panels with articulating mounts so when parked up I can tilt them towards the sun. Story for another post!


Sent from my iPhone using Tapatalk
This has reminded me of a question I meant to ask you, do you take your battery data via a direct connect to the CerboGX or did you fit a SmartShunt?
 
This has reminded me of a question I meant to ask you, do you take your battery data via a direct connect to the CerboGX or did you fit a SmartShunt?

Smartshunt. It also has another sensor on it that connects to the starter battery so I can monitor both! And then I set alarms if the starter battery gets too low when parked up for awhile. I then have a relay on the CerboGX I can switch to on remotely which sends battery power from the leisure batteries to the starter battery to top it up. Groovy stuff!


Sent from my iPhone using Tapatalk
 
Such a great set up!

I have a minor frustration with my Li upgrade in that the Bluetooth app isn’t very good so I don’t get any meaningful SOC data. I thought a SmartShunt would be the answer but because the batteries in the Ocean are split with one under the front seat and another in the rear cupboard I can’t make it work. The DC-DC is connected to the battery under the seat and my MPPT to the rear battery so without some extensive rewiring I can’t pick up the inputs from both chargers! I’ve mitigated my data paranoia by fitting a Victron battery sense to each battery so I can at least monitor voltage and temps so I can see if the BMS is doing its job.

I was hoping to fit a single 230ah under the front seat but it was impossible to fit the DC-DC in the same space and I would still have had the issue of running a cable from the MPPT at the rear to the front seat! It seems that your Joker is much easier to upgrade the power system!

It’s a bit easier as the batteries are u see both seats, but to improve the parallel connection I modified it with some busbars. Yours are still in a parallel setup for 12V so should be doable. I’d have to ask my mechanic though as he does this all the time on Cali’s. I’ll ping him and ask!


Sent from my iPhone using Tapatalk
 
Ha! Nice catch! I actually don’t use that anymore though as I’ve now got a Victron CerboGX and installed 5 Ruuvi tags around the van. These are much more accurate and can be placed in different areas. I’ve got one on the water tank, inside cabin, lower storage shelf in the rear and the rear cabinet. They connect via Bluetooth to the Victron CerboGX so I can have alarms triggered if anything gets close to freezing.

There is a different controller for the Eberspacher Hydronic IIC that you can change to for remote activation but I didn’t want to change from the standard one and don’t really have the need. If it’s a week of sub zero temps I just leave the heater on at 22.5C or so. However I use my van every day and work in it so that might not work for you.

And thank you! It was a ton of work but I’m really happy with the end result.

Although I have a new idea I’m working on with a friend that is a metal worker. He’s making me a custom roof rack to hold 2 solar panels with articulating mounts so when parked up I can tilt them towards the sun. Story for another post!


Sent from my iPhone using Tapatalk

I look forward that story Webbah, I am in a similar position of being able to WFH wherever "Home" happens to be.
 
I look forward that story Webbah, I am in a similar position of being able to WFH wherever "Home" happens to be.
What I am thinking is...if I am working remote...and I have a break...and decide to take the hound out for a walk...wouldn't it be nice instead of burning the energy of leaving the heat on...to be able to remotely start it up at 22.5c an hour from when I expected to be back at the Tardis...

Or...is the insulation that good that leaving it on negates the cost of reheating?
 
It’s a bit easier as the batteries are u see both seats, but to improve the parallel connection I modified it with some busbars. Yours are still in a parallel setup for 12V so should be doable. I’d have to ask my mechanic though as he does this all the time on Cali’s. I’ll ping him and ask!


Sent from my iPhone using Tapatalk
That’s very kind of you!
 
What I am thinking is...if I am working remote...and I have a break...and decide to take the hound out for a walk...wouldn't it be nice instead of burning the energy of leaving the heat on...to be able to remotely start it up at 22.5c an hour from when I expected to be back at the Tardis...

Or...is the insulation that good that leaving it on negates the cost of reheating?

It all depends on how cold it is, but if you’re walking the dog I’ll assume it’s not -10C. The insulation is very good and the heater runs at low speed or shuts off and starts when needed to maintain. One thing to note though and very important. Run the heater on high (40C) for an hour a month to keep the carbon deposit buildup in check. And also do not fill the coolant with radiator coolant for an engine. Use specified coolant for these systems like from Alde.


Sent from my iPhone using Tapatalk
 
These are 225/65 R17. But yes you do need to cut the plastic a little bit. Not a big deal. I also have an onboard compressor so inflated to 2 bar. And sprayed silicon on the Tyre to slide it right in.


Sent from my iPhone using Tapatalk
Hey Webbah, looking back on your thread I saw this post. I’ve just purchased the terrranger rear recovery points in prep for my big trip next year. I note you have to trim the plastic spare wheel tray to fit them. Given my spare barely fits I’m thinking I can just get rid of the plastic tray (and treat the metal underneath with Lanoguard or wax oil) which will be less hassle and give me a little more wiggle room for the spare. My question is does the plastic tray serve any structural purpose?
 
Hey Webbah, looking back on your thread I saw this post. I’ve just purchased the terrranger rear recovery points in prep for my big trip next year. I note you have to trim the plastic spare wheel tray to fit them. Given my spare barely fits I’m thinking I can just get rid of the plastic tray (and treat the metal underneath with Lanoguard or wax oil) which will be less hassle and give me a little more wiggle room for the spare. My question is does the plastic tray serve any structural purpose?

Hey Slammer,

Plastic likely won’t provide any structural purpose but I would guess it protects something under there. I’d have to pull it out to check I’m afraid! However I’d still do it with a small cut and keep the protection versus not having it and then all the road grime gets in and around there. My diesel heater is just in front to the left of that piece and I believe the Cali is the same.


Sent from my iPhone using Tapatalk
Thanks - instinctively I assumed VW wouldn’t fit it if it served no real purpose, I was just hoping I can make the job a bit easier! I’m pretty sure the diesel heater on the Cali is under the RHS driver seat floor, I’ll be interested to see what is under the plastic cover when I remove it…
 
Thanks - instinctively I assumed VW wouldn’t fit it if it served no real purpose, I was just hoping I can make the job a bit easier! I’m pretty sure the diesel heater on the Cali is under the RHS driver seat floor, I’ll be interested to see what is under the plastic cover when I remove it…
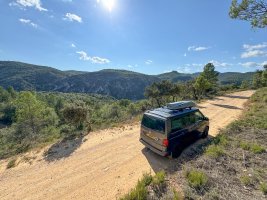
I was out in Spain this year and did a bit of off-road. Managed some nice scraping on the van under-belly. Nothing serious but not a great sound. The one thing I did do was bend the spare tyre lock on a rock - so I'd avoid one of those (whilst off road at least). I'm definitely going to get some undervan protection.
IMG_7831.jpg
 
I was out in Spain this year and did a bit of off-road. Managed some nice scraping on the van under-belly. Nothing serious but not a great sound. The one thing I did do was bend the spare tyre lock on a rock - so I'd avoid one of those (whilst off road at least). I'm definitely going to get some undervan protection.
View attachment 131172

Both Slam and me do have underbody protection. Please note that it’s not wise to get the transmission protection as this has caused overheating on numerous vans and tranny failure. The other bits are fine. What he’s referring to is the plastic cover that is above the spare Tyre. Need to cut that slightly to install recovery hooks.


Sent from my iPhone using Tapatalk
 
I was out in Spain this year and did a bit of off-road. Managed some nice scraping on the van under-belly. Nothing serious but not a great sound. The one thing I did do was bend the spare tyre lock on a rock - so I'd avoid one of those (whilst off road at least). I'm definitely going to get some undervan protection.
View attachment 131172
To second Webbah underbody protection is a good investment, a front skid plate and diff cover should be a good compromise between decent protection without adding too much weight. Rock sliders are a good idea too. The diff is the lowest point underneath, it was lucky that your spare wheel lock took a bash and not the diff, that could be very expensive! Do you have a lift or you running stock height?

Great photo by the way! Is that in the Pyrenees?
No lift. Mulling Bilstein/Eibach 35mm etc but not sure how this affects the ride - which is fine (and much better than my previous T6 /2wd) or if the warranty is compromised.
The location is quite remote with some interesting rock formations and ok for a wild camp. Castell de Finestres, just south of Spanish PyreneesDJI_0039-2-Pano.jpeg
 
No lift. Mulling Bilstein/Eibach 35mm etc but not sure how this affects the ride - which is fine (and much better than my previous T6 /2wd) or if the warranty is compromised.
The location is quite remote with some interesting rock formations and ok for a wild camp. Castell de Finestres, just south of Spanish PyreneesView attachment 131173
Stunning vista!

I have bilstein lift and no issues with warranty. It actually improved the handling, the KO2’s have had a bigger effect on the ride but I’m on 18” rims. If I did it again I’d go with 17”
 

VW California Club

Back
Top