Dash camera install

You can run the cable to the rear camera with out taking any panels off.
One you get to B pillar use something plastic to work the cable behind the panel and then there are three LED lamps remove them and work the cable behind the panel, ( this is all kitchen side ) once you get it to the LED lamp nearest the wardrobe then go to the rear of the vehicle and open the cubboard that houses the gas bottle look up and you will see a gap in the trim close to van roof.
You will need some stiff cable. I used a length of aerial coax left over from another job. At this point you need a bit of patience and work it through and you will see it at the LED light housing attach the cable to it and pull through, nice and steady. From there it is straight forward. I hope this helps all.
Excellent! Followed your instructions and now have a piece of string in place front to back ready to just pull the wire through. Used my most technical piece of kit in my toolbox, a wire coat hanger for the bit from last LED to back of van.

Mike
 
Excellent! Followed your instructions and now have a piece of string in place front to back ready to just pull the wire through. Used my most technical piece of kit in my toolbox, a wire coat hanger for the bit from last LED to back of van.

Mike

Hi Mike,

How did you route the string from the rear kitchen LED to the back? When I tried to do this with a dummy wire, it ended up firmly wedged above the kitchen airvent (in between the top of the vent and the top of the trim) - took a lot of pulling and swearing to dislodge it! Luckily nothing damaged - bit wary of trying again now though!

So I guess from the rear kitchen LED, the wire need to go towards the front of the trim - but is there enough room for the small USB end of the cable there (without removing any trim)?

Wondering whether to get some small cable rods before I attempt this again - something which won't bend as I'm pushing it through.

Also - which end did you start from, front or back?

Once its at the front end of the kitchen it looks like an easy job to tuck it into the headlining.
 
Hi Nick. Only place where it was tight was the centre of the three LED lights. Mine was a bit stubborn to come out so I left it in situ and used the other two.
I removed the front LED and rear LED. I then fed a coat hanger through from the front to the rear. Taped a piece of string to it at the rear LED and pulled it through to the front.
Next I put the coat hanger into the rear LED and fed it through to the back keeping it tight to the near side. When I went to the back tailgate I felt around at the top of the cupboard, above the top shelf and found the coat hanger. I taped the string to the end at the LED and pulled it through to the back.

Hope that helps.

Mike


Sent from my iPhone using Tapatalk Pro
 
Thanks Mike - really helpful. I'll find a coathanger and give it a go!
 
So what fuse could be used to piggyback off in a T5.1 beach. Want an ignition switched one. Any ideas?
 
So what fuse could be used to piggyback off in a T5.1 beach. Want an ignition switched one. Any ideas?

So the way I would find out is get a test light and connect one end to earth, (clean metal on body work) the other end needs to be touching the metal of the fuse you are testing.Turn the ignition on and if it lights up and then goes off when you turn the ignition off that would be ignition fuse.
I hope that makes sense to you.
 
I see VW are offering a fully fitted kenwood drv-410 for £210.
Just considering accessories while I wait for the van to arrive. Anyone gone for the VW dealer fit dash cam?

I like the idea of having it wired in (not something I could do myself). Can't find any reviews of the Kenwood drv-410 but assume its fairly decent.
 
Just considering accessories while I wait for the van to arrive. Anyone gone for the VW dealer fit dash cam?

I like the idea of having it wired in (not something I could do myself). Can't find any reviews of the Kenwood drv-410 but assume it's fairly decent.

I hardwired my Thinkware 770 (front and rear) after the instructions from @Loz (Thanks) in this thread. It was super easy, and you can only see the wire running from the camera to the top of the windscreen. Did not take long to do … a few days later it already earned its price. A bus hit our bike rack in Croatia and drove off. We had everything on camera! Police and insurance were happy ;-)
 
I hardwired my Thinkware 770 (front and rear) after the instructions from @Loz (Thanks) in this thread. It was super easy, and you can only see the wire running from the camera to the top of the windscreen. Did not take long to do … a few days later it already earned its price. A bus hit our bike rack in Croatia and drove off. We had everything on camera! Police and insurance were happy ;-)

I've got the thinkware camera in my daily driver car and i really like how low profile it is, with no screen etc. Does look near-oem fit really
 
A bus hit our bike rack in Croatia and drove off. We had everything on camera! Police and insurance were happy ;-)

Do you have a rear facing camera? If so, I was wondering if you could see much out of the rear window with a bike rack and bikes.
 
Do you have a rear facing camera? If so, I was wondering if you could see much out of the rear window with a bike rack and bikes.

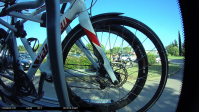
It's a compromise. I mounted the rear camera on the closet wall. So it's asymmetrical, but I thought it would be the best place, not to have it in the way, and most of my driving are LH, so most cars will come this way around. This is what you actually can see.

I have thought about moving the camera to sit on the tailgate (The cable is long enough), so it can film even if the blinds are closed.

Skærmbillede 2017-08-31 11.36.00.png
 
Thanks @Kmann. I thought that the view would be much worse, which was pushing me towards a tow bar bike rack rather than the tailgate rack. It doesn't look too bad at all.
 
Bought a Thinkware F770 this week and installed front camera on my T6 Ocean with no problems. Would not have attempted the hardwire install without all the contributions above so thanks to everyone especially Loz. I used the red scotchlok connectors which are ok for cables down to 24 gauge and are on ebay for a couple of quid.
I can see how to route the cable for the rear camera from the rear shelf unit, through the wardrobe and above LEDs to the B post, but I cant for the life off me work out how to route it on from there through the the A post. Any help would be greatly appreciated.

I run mine tugged under the door rubber … and then between the screen and the roof …
 
I run mine tugged under the door rubber … and then between the screen and the roof …
I have a BlackVue system and ran the cable from the rear camera along the same route as @Kmann to the front camera.

Alan
 
Thanks @Loz for your helpful guidance on how to wire a dashcam into the control unit and to others for guidance on how to route a cable to the rear dashcam. I did it on the weekend and here’s what I learnt:

Scotchlock onto the wires as far away as possible from the connector because they are bulky and make it difficult to refit the control panel.

Don’t earth onto one of the 4 screws that you remove as they go into plastic. There are 2 others that you don’t have to remove that go into metal.

Test the dashcam before you refit the control panel.

Don’t over tighten the screws inside the sunglasses socket. The frame on our 6 month old Cali was cracked before I even took them out!

Getting the control unit back in is an abs pig. I found it easier to assemble it first rather than try to refit the part with the light switches after: it just wouldn’t go in.

Getting the rear cable around the left A pillar was difficult: I removed the sunvisor and roof handle then had to deform the roof lining but thankfully its shape recovered.

When removing the larger central light from the left coving trim you need to prise down the front end.

Getting past the B pillar is easy with the front door rubber removed at the top and a straightened coat hanger through from the front coving light. You don’t need to remove the B pillar trim.

You don’t need to remove the air vent in the coving. Insert the coathanger rearwards from the rear coving light so it goes under what’s inside.

We have a bike rack and by far the best view is in the centre of the window at the bottom. Initially I threaded the cable and plug through the tailgate gaiter with great difficulty and lots of Wd40. However I just couldn’t see where to go from there as the tailgate void doesn’t seem to open to anywhere around the window and I couldn’t remove the upper window trim to see. The instructions on how to remove the trim on another thread didn’t work and you seem to have to forcefully push the arms sideways to release the clips but the arms are trapped by the double glazing. I gave up for fear of breaking the trim or the glass. In the end I routed the cable out from the roof trim under the tailgate seal at the top centre. I cut a small notch in the trim. Then the cable ran across the tailgate opening to the rear blind catch and around the window in the gap between the window and the trim.

Hope that helps someone.
 
  • Like
Reactions: Loz
Thanks @Loz for your helpful guidance on how to wire a dashcam into the control unit and to others for guidance on how to route a cable to the rear dashcam. I did it on the weekend and here’s what I learnt:

Scotchlock onto the wires as far away as possible from the connector because they are bulky and make it difficult to refit the control panel.

Don’t earth onto one of the 4 screws that you remove as they go into plastic. There are 2 others that you don’t have to remove that go into metal.

Test the dashcam before you refit the control panel.

Don’t over tighten the screws inside the sunglasses socket. The frame on our 6 month old Cali was cracked before I even took them out!

Getting the control unit back in is an abs pig. I found it easier to assemble it first rather than try to refit the part with the light switches after: it just wouldn’t go in.

Getting the rear cable around the left A pillar was difficult: I removed the sunvisor and roof handle then had to deform the roof lining but thankfully its shape recovered.

When removing the larger central light from the left coving trim you need to prise down the front end.

Getting past the B pillar is easy with the front door rubber removed at the top and a straightened coat hanger through from the front coving light. You don’t need to remove the B pillar trim.

You don’t need to remove the air vent in the coving. Insert the coathanger rearwards from the rear coving light so it goes under what’s inside.

We have a bike rack and by far the best view is in the centre of the window at the bottom. Initially I threaded the cable and plug through the tailgate gaiter with great difficulty and lots of Wd40. However I just couldn’t see where to go from there as the tailgate void doesn’t seem to open to anywhere around the window and I couldn’t remove the upper window trim to see. The instructions on how to remove the trim on another thread didn’t work and you seem to have to forcefully push the arms sideways to release the clips but the arms are trapped by the double glazing. I gave up for fear of breaking the trim or the glass. In the end I routed the cable out from the roof trim under the tailgate seal at the top centre. I cut a small notch in the trim. Then the cable ran across the tailgate opening to the rear blind catch and around the window in the gap between the window and the trim.

Hope that helps someone.

I just tugged the cable on top of the ceiling trim across the windscreen towards the A-pillar. When going past the A-pillar I simply tugged the cable under the plastic trim, without removing anything, from there it just sits under the rubber seal across the window. So no need to touch the trim. Again tugged under the B-pillar trim. Then layed over the plastic trim across the kitchen windows. In fact, only trim removed was the one between the two kitchen windows. It just pulls off gently. I was surprised how fast the install was over acrually. Only bummer – I had the re-run the cable, due to the plugs are differend, and when finished, the front end was at the rear :)
 
I put my rear one on the same panel as the previous photo but on the vertical side rather than underneath. As I have a Beach underneath would have been a bit exposed (no rear locker). It needs to be offset to either the right or left to clear the top hook for the tailgate blind.
View attachment 18033
View attachment 18035
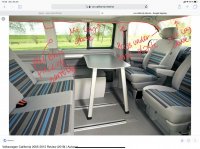
I took the wiring down the nearside of the van running it in the panel that houses the led lights & air vents. (above the cooker & fridge on the SE)
View attachment 18034

The wire could be routed reasonably easily in the cab headlining, just need to peal back the door rubbers a bit. That gets you to the B pilar and can then access the living area trim. B pilar trim comes off quite easily (but is a pig to put back and get the sliding seatbelt slot in line). Possibly you don't need to remove the trim I can't remember Im afraid. I did pop out the 3 LED lights & the heater vents so that I could fish around being the trim. The middle (large) light was also a fiddle to get back into place.
I completely removed the trim across the top of the tailgate area (it hadn't been fixed properly anyway after roof work), then had better access to get the cable the last part of the way. Used a variety of hooks, bent rods etc to help in routing the cable. The camera I had came with some sticky pads to hold the cable prevent rattles. Also used some small zip ties & wiring loom tape.
The SE/Ocean is obviously going to be a bit different with the wardrobe.
Good luck, its a fiddly job so take your time.
 
Hi loz. You said....
I completely removed the trim across the top of the tailgate area (it hadn't been fixed properly anyway after roof work), then had better access to get the cable the last part of the way. How easy was this to do? Any tips?
 
Hi loz. You said....
I completely removed the trim across the top of the tailgate area (it hadn't been fixed properly anyway after roof work), then had better access to get the cable the last part of the way. How easy was this to do? Any tips?
I didn’t say that, not me sorry.
 
I put my rear one on the same panel as the previous photo but on the vertical side rather than underneath. As I have a Beach underneath would have been a bit exposed (no rear locker). It needs to be offset to either the right or left to clear the top hook for the tailgate blind.
View attachment 18033
View attachment 18035
I took the wiring down the nearside of the van running it in the panel that houses the led lights & air vents. (above the cooker & fridge on the SE)
View attachment 18034

The wire could be routed reasonably easily in the cab headlining, just need to peal back the door rubbers a bit. That gets you to the B pilar and can then access the living area trim. B pilar trim comes off quite easily (but is a pig to put back and get the sliding seatbelt slot in line). Possibly you don't need to remove the trim I can't remember Im afraid. I did pop out the 3 LED lights & the heater vents so that I could fish around being the trim. The middle (large) light was also a fiddle to get back into place.
I completely removed the trim across the top of the tailgate area (it hadn't been fixed properly anyway after roof work), then had better access to get the cable the last part of the way. Used a variety of hooks, bent rods etc to help in routing the cable. The camera I had came with some sticky pads to hold the cable prevent rattles. Also used some small zip ties & wiring loom tape.
The SE/Ocean is obviously going to be a bit different with the wardrobe.
Good luck, its a fiddly job so take your time.
 
Morning All,

Sorry to revive an old thread but I am looking to ascertain where hard-wiring a dash cam would leave me in terms of warranty?
I have recently purchased our 2019 Beach and am keen on a dash cam but not wanting to void warranty.

I have been looking at the Next-base 222 - has any one any feedback on this model?
My intention would be to pay Halfords to conduct the fit as opposed to having a go myself.
 

Similar threads

M
Replies
4
Views
4K
JamesTT
J
Racing 47
Replies
14
Views
4K
Van Diesel VW
Van Diesel VW
L
Replies
2
Views
1K
Lorri
L
This Eva
Replies
19
Views
2K
dspuk
dspuk
J
Replies
1
Views
1K
HistoryBob
H

VW California Club

Back
Top