Buy all your VW California Accessories at the Club Shop Visit Shop

Guide - Fitting The Small Under Bench Drawer

Ok, just use SS2 6ES for now.
Town is Southend-on-Sea, Essex, UK.

Cheers

I got this. Will sort shipping cost if you are interested. But dono what the piece shall cost?

d688783fbe46bfea5974f77de201412a.jpg
5250cd7a1d48ac05e479a5096916e5e8.jpg
293eb562233dd3a50ec00c0ba389133a.jpg


Sent from my iPhone using Tapatalk Pro
 
I got this. Will sort shipping cost if you are interested. But don't know what the piece shall cost?

d688783fbe46bfea5974f77de201412a.jpg

If you would be so kind to check what the shipping cost would be, I’d be grateful.

I haven’t checked what the price would be - what would you want for it?
 
If you would be so kind to check what the shipping cost would be, I’d be grateful.

I haven’t checked what the price would be - what would you want for it?

Shipping is 38£ and 4-5 days.
 
Shipping is 38£ and 4-5 days.
Wowsers, those couriers are asking for more and more money these days!

I can order the part here in the U.K. for £42 so will save you the hassle of sorting out international postage, but thanks for the offer all the same - much appreciated.
 
Wowsers, those couriers are asking for more and more money these days!

I can order the part here in the U.K. for £42 so will save you the hassle of sorting out international postage, but thanks for the offer all the same - much appreciated.

Agree ;-)
 
Not sure where mine went.....however as mine was of a 2017/2018 cali it will be a different color i believe. Something to check if you do order one as i initially made the mistake of ordering the old drawer.
 
Not sure where mine went.....however as mine was of a 2017/2018 cali it will be a different color i believe. Something to check if you do order one as i initially made the mistake of ordering the old drawer.

I’ve ended up spray-painting the bed plastics black with some VHT I bought from VinylDye.co.uk, so colour won’t be a problem - but thanks for the heads-up all the same Jason
 
I managed to get one of these for £10 from Kernow in the end, but thanks all for your help :thumb
 
I decided I would put one of these drawers in my 2018 California Ocean, as you can never have enough drawers!
I followed the handbook instructions on removing the blanking plate to the compartment which proved very difficult to budge but with a little encouragement from a crow bar eventually moved !
I contacted VW Commercials Wrexham and spoke to the most unhelpful, grumpy, parts-man that ever walked the earth. After much discussion and explaining he stated the parts needed were as follows (see below) which have slightly different parts numbers to those previously listed, the cost together is nearly £500 so I am currently deciding how desperate I am for this drawer.

1 x Drawer front 7E7 006746592W £87.35
1 x Drawer 7E7 067461A £242.90
2 x Drawer Runners 7H7 067470 £72.11 each.
8 x Screw N907 75001 £0.30 each.
2 x Screw N905 62401 £0.85 each.

Any comments on these different part numbers would be appreciated, as well as experiences of interactions with VW parts staff!

Hi
Just tried getting new prices for these items especially the drawer front to try and establish if it is the correct colour my Cali which is a 19 and after taking the one off in my vehicle it stated it was moon rock and of course the other number would be for the drawer it self, unfortunately after inputting the part numbers for these two items it came back as bad numbers so couldn't take it any further so I asked the Parts guy to try the old part number which is for the drawer and that is still showing as available but could not determine the colour of the drawer and with it being a special order I would not be able to return the item just wondering if anybody else could shed light on the part numbers.
 
Has anyone tried one of these as a cheaper alternative?
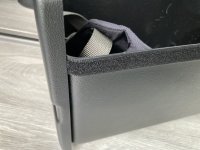
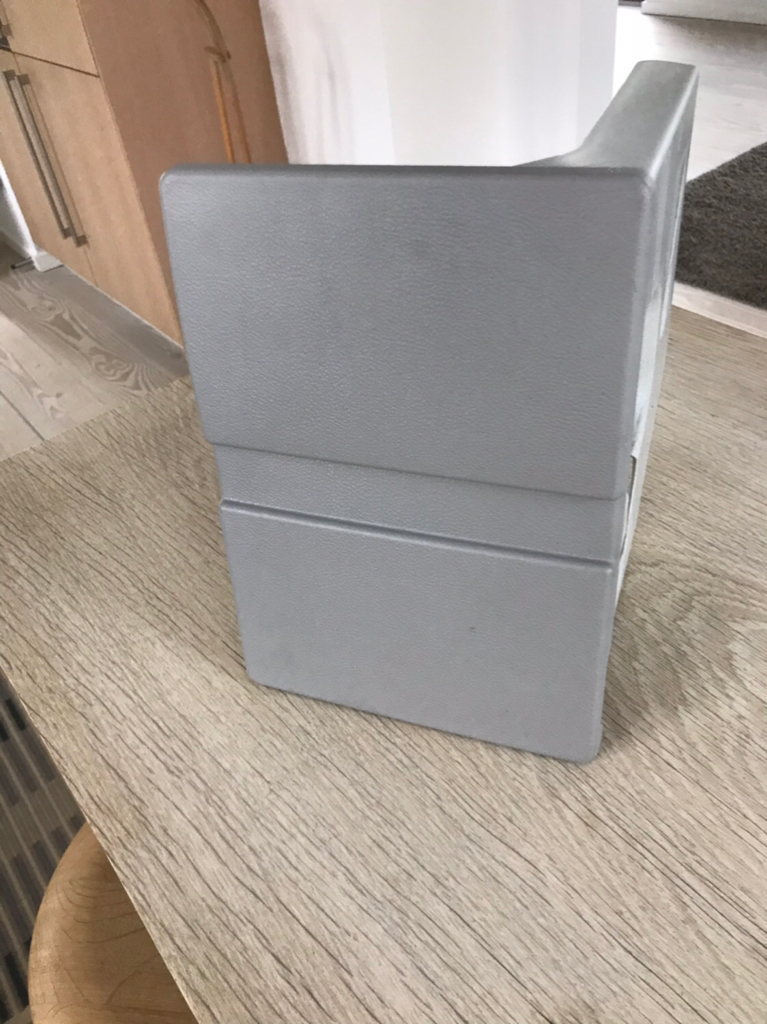
I bought one recently. Fast postage. I’m not sure what I was expecting but it is literally just a single piece of reasonably thin but seemingly fairly robust plastic. You remove the existing front piece (just slides off) and then the new drawer just slides into the hole which is exposed. There are no runners or attachment of any kind (to the floor or the seat). To open it you just pull it along the floor. There is a piece of Velcro (loop, not hook!) on the side which is against the small table, to stop it scratching. The capacity is good, and it does the job. I certainly won’t be getting rid of it, but it definitely did feel over-priced for a piece of plastic. Will try to put a photo up.
 
I bought one recently. Fast postage. I’m not sure what I was expecting but it is literally just a single piece of reasonably thin but seemingly fairly robust plastic. You remove the existing front piece (just slides off) and then the new drawer just slides into the hole which is exposed. There are no runners or attachment of any kind (to the floor or the seat). To open it you just pull it along the floor. There is a piece of Velcro (loop, not hook!) on the side which is against the small table, to stop it scratching. The capacity is good, and it does the job. I certainly won’t be getting rid of it, but it definitely did feel over-priced for a piece of plastic. Will try to put a photo up.
Thanks for the info, I was definitely expecting a runner!
 
I bought one recently. Fast postage. I’m not sure what I was expecting but it is literally just a single piece of reasonably thin but seemingly fairly robust plastic. You remove the existing front piece (just slides off) and then the new drawer just slides into the hole which is exposed. There are no runners or attachment of any kind (to the floor or the seat). To open it you just pull it along the floor. There is a piece of Velcro (loop, not hook!) on the side which is against the small table, to stop it scratching. The capacity is good, and it does the job. I certainly won’t be getting rid of it, but it definitely did feel over-priced for a piece of plastic. Will try to put a photo up.

That’s disappointing.
Should be on a runner really.
 
Last edited:
Photos of the vwcampershop.nl one, for info:

IMG_0286.JPG

IMG_0288.JPG

IMG_0289.JPG

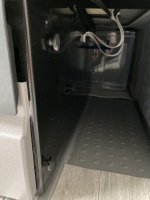
And the hole into which it slides once you've removed the original fascia - the three flanged bits on the left are not utilised in any way with the new drawer.

IMG_0287.JPG
 
Looks pretty neat despite the lack of runners and good that it still leaves the option using the load through space if needed.
 
You could make it fit with holes cut straight, to click it in the existing things.
Not the curved ones like original the facia.
But if it doesn't slide out on an emergency stop, I guess it will be no problem?
 
Like you say it looks okay and quite handy if you can still use the load through pace and if it stays there in an emergency stop but I think I would prefer it to be on runners it's just that other bit now the £500 :Nailbiting I did have the drawer fitted to my last Cali and that turned out to be very useful I will have to have a long think.
 
I bought one in the end. It is pricey but does seem well made and creates a reasonable amount of useable space whilst not sacrificing the load through.
When you compare it to other stuff made specially for the cali it's not that outrageous. I'll only use it for trips away and am going to get some vecro to stop it sliding about.
It was also a good excuse to get the bin that goes behind the passenger seat at the same time.
 
I managed to get one of these for £10 from Kernow in the end, but thanks all for your help :thumb
What was it you bought and can you send me the link?

Thanks

Sent from my Pixel 2 using Tapatalk
 
I gave my local dealer the part numbers and have just been quoted 900GBP to supply and fit :eek::Nailbiting (Norwegian prices)
 
There is an additional small drawer that can be fitted alongside the much larger one under the bench seat to increase useable storage space.

You will need the following parts -

1 x Drawer - 7E7 068 041 30T £108
2 x Drawer Runners - 7H7 067 470 £48 each (See note below)
8 x Screw - N907 750 01 £0.30 each
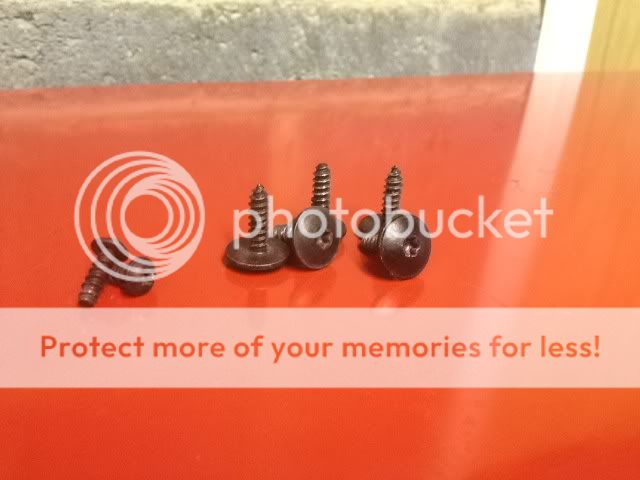
2 x Screw - N905 624 01 £0.85 each

You can purchase the drawer runners commercially at a lower price than VW sell them for. I found a place located in Poole, Dorset (SCF Hardware) who keep them in stock. You will need to buy 2 pairs of Hettich Quadro V6 450 Soft Close, Part Number 0 072 175 priced at £18.28/pair. You will only need the 2 left drawer runners out of the 2 pairs but sadly they are not available individually.

and the following tools -

T20 Torx Screw Driver
Small Phillips Screw Driver
17mm Open End Spanner
Electric Drill
2.5/3.0mm Drill Bit
Small Ruler
Marking Pen
Small Hammer
Centre Punch


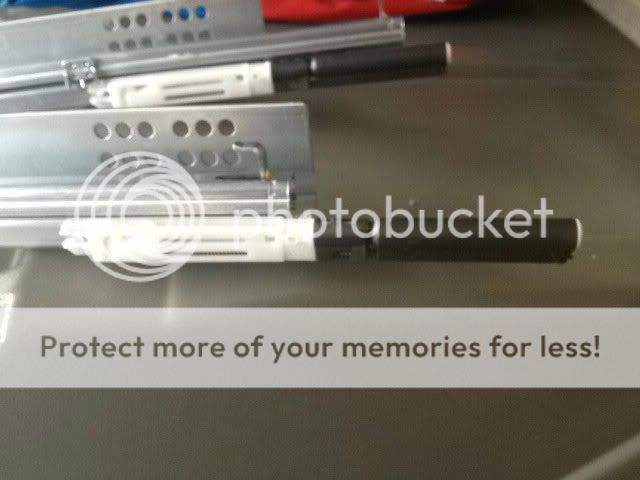
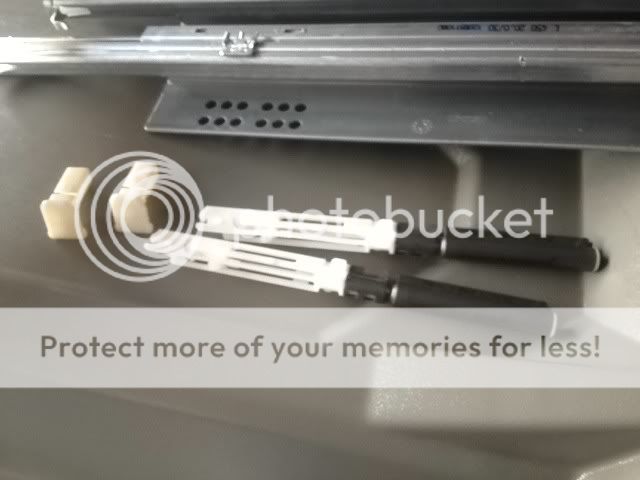
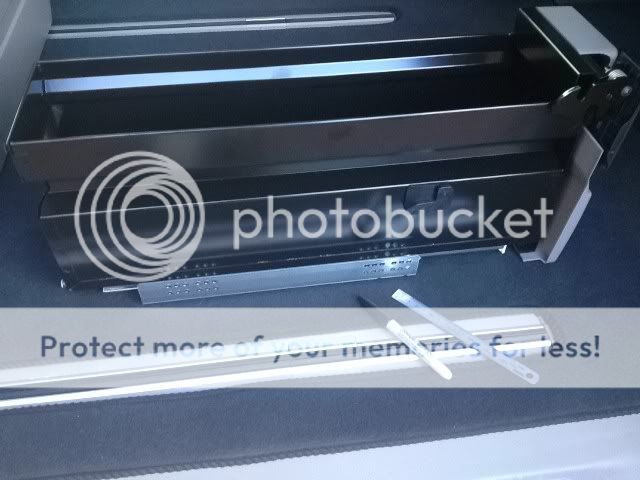
If like me you buy the drawer runners from an alternative supplier they will come with some extra parts fitted which will need to be removed -

Runners.jpg


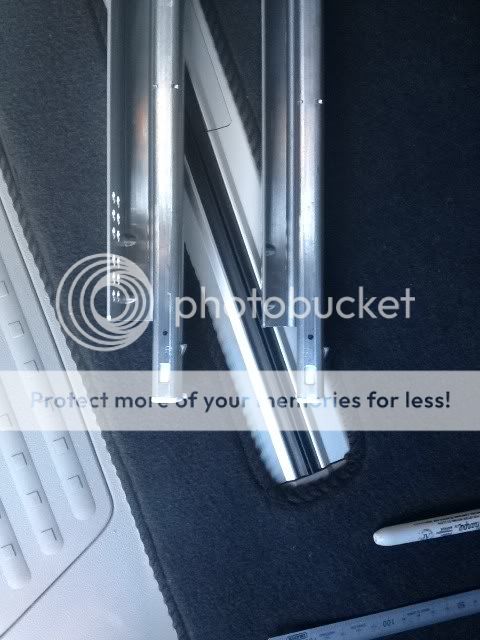
Parts removed -

RunnersPartsRemoved.jpg


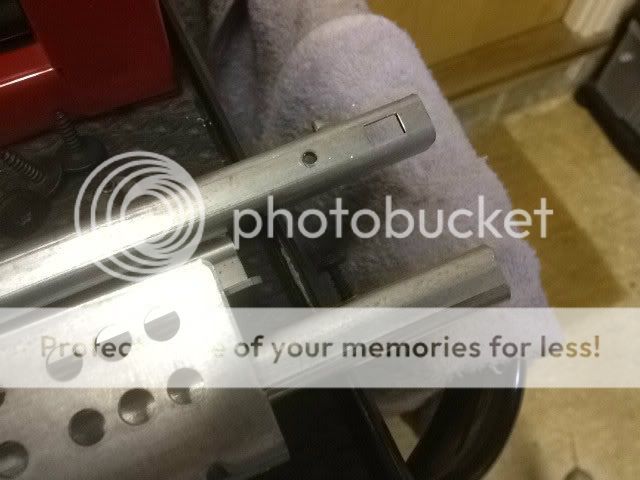
The drawer runners will require a small (2.5/3.0mm) locating hole drilled to hold it in place when fitting the drawer.

To do this you will need your ruler and marker pen. Position the drawer runner in the correct place on the lower part of the drawer. You will see it locates at the rear on a 'tang' which sits in a rubber grommet fitted to the drawer -

MeasuringUp.jpg


If you look inside the drawer you'll see there are two small holes which will house the two small locating screws for the drawer runners (Look inside your existing drawer for hints)

Use your ruler to ensure that the drawer runner is fitted squarely onto the drawer, I measured 15mm from the edge of the drawer to the outer edge of the drawer runner as shown below -

MeasuringUp2.jpg


With the runner carefully located and positioned, mark the drilling point using the hole inside as your marker point. Once you've marked the first runner swap it for the second runner before aligning it and marking it as for the first one. I suggest to mark both using the lower fitment as it is more stable and will use the natural weight of the drawer to hold it in place while you mark it.

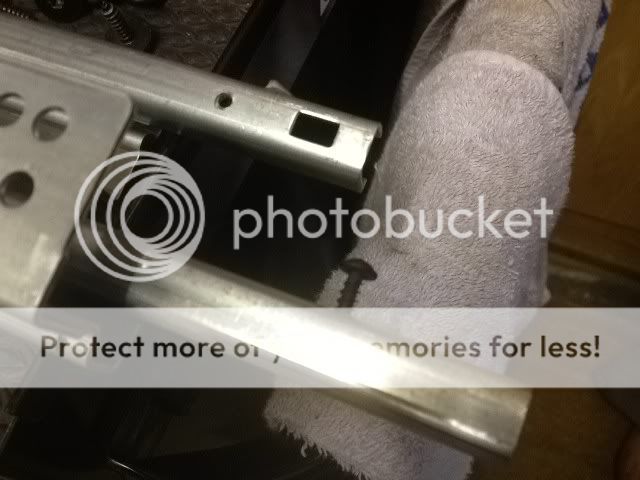
The two small dots indicate where to drill. Use a small hammer and centre punch to centrally mark the position of the holes ready for drilling.

MeasuringUp3.jpg


Drill the holes using a suitable sized drill to match the screws you use.

Drilled.jpg


Run the screws down the holes to prepare them and make the future fitting easier -

DrilledWithScrew.jpg


Remove the rear mattress and support frame. Move the bench seat to its rear most position and if fitted remove the tyre inflation kit.

Remove the plastic blank cover from the bench seat base by gently lifting it off of its locating pegs.

Looking into the smaller opening under the seat you will see the pre-drilled holes that we are going to use to fit the drawer runners. I chose to run the screws down each of the holes to make it easier when fitting the drawer runner.

You will see I used a Bosch Exo Electric Screwdriver which is both small and right-angled making the task of doing the screws up much easier

FixingTheRunners.jpg


FixingTheRunners1.jpg


The screws -

Screws.jpg


Note your screws might be slightly different as I used some I already had in my toolbox.

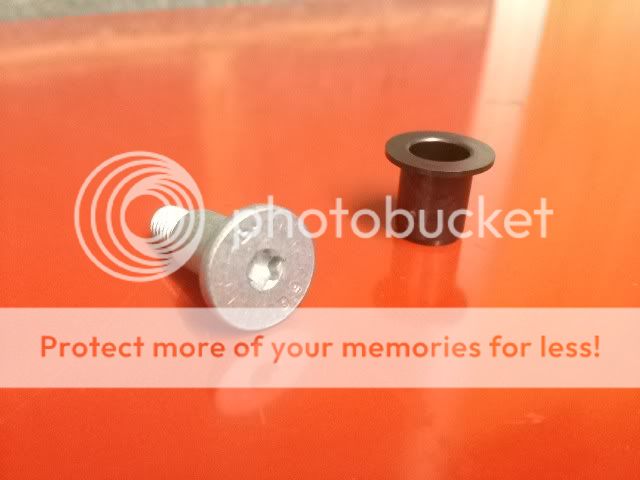
Inside your drawer you should have found a small plastic bag which contains the drawer locking spigot. If you have a Facelift California the hole you need for the draw locking spigot is already there. If the California is not Facelift it becomes a little more complicated and you will most likely have to remove the bench for some measuring up and drilling of the bench seat base to fit the spiggot.

LockBolt.jpg


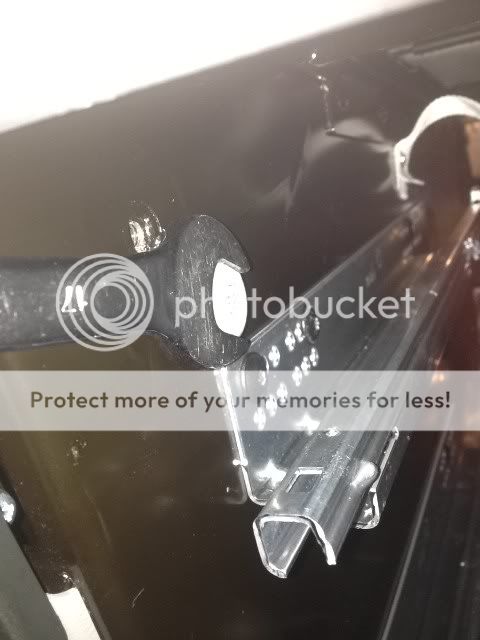
You will need to remove the uppermost locating spigot already in the bench seat base before you can fit the new part for the drawer adjacent to it. This is where you'll need your 17mm open end spanner -

Removing17mmLockScrew.jpg


Now screw in the drawer locking spigot. (Notice in the picture I still have the uppermost locating spigot in place, I later removed it) -

FixingTheLockBolt.jpg


Once you have all the drawer runner screws in place (4 in each), position the drawer on to the drawer runners and fit the two small locating screws on the inside of the draw -

DrawerFitted1.jpg


Close the drawer and admire your excellent handy work -

DrawerFitted.jpg


The reason for pushing the seat bench to it's rear most position is tow fold. Firstly it makes access to the rear of the bench seat easier but also once you've fitted the new drawer you should move the seat bench fully forward and hoover the seat rails to remove any arisings and swarf from the area to prevent long term damage.

This might look a little complicated but I was pleasantly surprised at just how easy it was and it took around 45 minutes to do the whole job which I don't think is too bad.

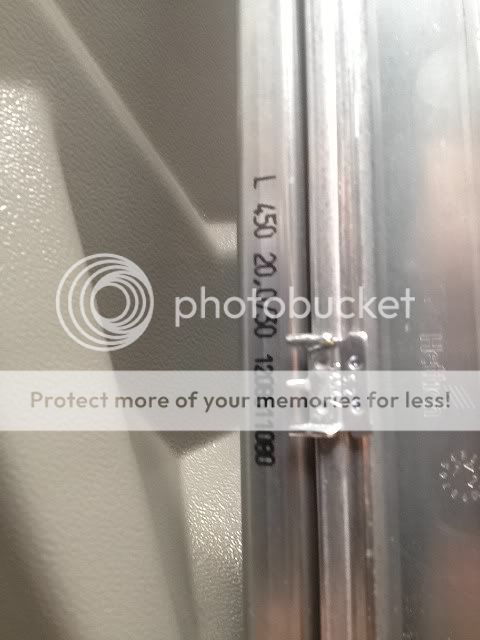
Drawer Runner Details -
RailPartNumber.jpg
Hi Stu! I Need help please! I bought the little drawer from our friendly VW dealer ad they said that they ll fit it for me as part of a deal. Ha, the drawer came and they saw that first parts are missing and secondly that my vw t5 doesn’t have the holes drilled in!!!!!!!As I ordered the drawer they don’t let me give it back neither now. Don’t worry on commenting lets say I am ok now with it ‍♀️
So I have bought thanks to your report the metal parts for the drawer for the left side from Hettich. Now the screws are missing and more importantly the holes ‍♀️♀️♀️
So now my question: How difficult is it to get the holes right? What do you think?
Or is there anybody out there who hasn’t the drawer fitted and can take a photo of the side which shows where the holes are and like that I can print it and copy the holes?
Please if anybody can help….
Many thanks
Greetings from Lanzarote
Simone (vw t5 California comfortline 2007)
 
Back
Top