Buy all your VW California Accessories at the Club Shop Visit Shop

How to Fix Kitchen Tap and Water Pump Problem and solution.

This thread, from page 1 to the last posts re micoswitches has been a saviour. We have now replaced the fuse, the pump and the tap! Why did we need to change everything? Because we have the additional shower on the rear and being complete numpties to electrical circuits we failed to realise that if you leave it switched on (by accident ) while you try to isolate your fault it will bamboozle you! The result was not pretty!
45714
45715
 
This thread, from page 1 to the last posts re micoswitches has been a saviour. We have now replaced the fuse, the pump and the tap! Why did we need to change everything? Because we have the additional shower on the rear and being complete numpties to electrical circuits we failed to realise that if you leave it switched on (by accident ) while you try to isolate your fault it will bamboozle you! The result was not pretty!
View attachment 45714
View attachment 45715
Oops
 
Thanks MrChees, that makes sense.
I found the clip on the floor, cleaned-up the switch and re-fitted it. The only way I can make the tap work with the lever is flipping lever down to switch on, rather than up. Any ideas anyone?
New tap is ordered & will fit the relay switch when I install it!
 
Thanks MrChees, that makes sense.
I found the clip on the floor, cleaned-up the switch and re-fitted it. The only way I can make the tap work with the lever is flipping lever down to switch on, rather than up. Any ideas anyone?
New tap is ordered & will fit the relay switch when I install it!

Sounds like the switch is upside down. Or can it only fit one way.
 
Sounds like the switch is upside down. Or can it only fit one way.
It only fits one way. I think that, from 9 years of use, its become hardened/lots its spring. With the lever in the normal position the water will come on when I lever up but doesn't turn-off in lever down. If i rotate the lever towards me before fitting so it starts in a lower position (i.e. the catch inside the lever is the wrong-side of the switch) then it all works fine - just in reverse (i.e. down to tun on).
 
It only fits one way. I think that, from 9 years of use, its become hardened/lots its spring. With the lever in the normal position the water will come on when I lever up but doesn't turn-off in lever down. If i rotate the lever towards me before fitting so it starts in a lower position (i.e. the catch inside the lever is the wrong-side of the switch) then it all works fine - just in reverse (i.e. down to tun on).
Aussie California? :happy
 
I want to add one more thing. In all this process I did one thing wrong. When you cut connector from old water pump make sure cut little extra wire so you can attach new one with out any problem. I cut very sort but after little fights I have managed to connect new pump.

View attachment 8187
Hi, good job, do you have a link to the pump you purchased?
 
Ok guys, as promised, here's my DIY, inspired by jeetu2k.

Before I got the new pump from ebay, I bought a multimeter and checked that there was actually 12V at the pump, like jeetu2k explained.

As it turns out, the reason why my pump was broke, was some plastic (wrapping stuff) stuck in it.

So beware when you fill your tank!


This is the exact pump i got:

http://www.ebay.com/itm/CARAVAN-MOTORHOME-12V-SUBMERSIBLE-WATER-PUMP-COMET-VIP-PLUS-20L-PER-MINUTE-NEW-/181992652364?nma=true&si=WZUPJ26eGq9g1uVrSKfgPiSfT%2FQ%3D&orig_cvip=true&rt=nc&_trksid=p2047675.l2557


Here are the tools I used:

To create tool for water tank lid opening:
  • Regular broomstick
  • Hex Bolts M8 x 45mm
  • Drill (only drilled 6mm hole to make them stick!)
  • Wrench for bolts
  • Duct tape
Warning! The first attempt broke the tool, so I had to create a new one wrapped in duct tape (for reinforcement). That's how stuck the freaking lid is...

For the rest:

  • Small flat screwdriver
  • Diagonal pliers
View attachment 15034


Step by step:

  1. Unplugging the old pump and water level gauge

    Pretty straight forward, unclip the two connectors.


  2. Removing water tank lid

    Not easy, as mine was more or less stuck. Had to make two versions of the tool to finally force it open.

    As you can see, the one without duct tape simply broke.

    View attachment 15038


  3. Cut wires from old pump and keep connector

    Remember to keep some extra wires, so you have enough to connect a terminal block to it (grey plastic thingy i've attached at the end there)

    View attachment 15044


  4. Loosen water hose
  5. Remove old pump

    Old vs. new pump - exactly same size and details.

    View attachment 15045

  6. Place new pump and connect water hose
  7. Connect wires

    This is a little tricky, especially getting the new power cables from inside the water tank and out. This is because there is a rubber sealer thing there, that is very tight.

    I just removed it, created a little "fishing line" with some of the cable from the old pump, and fished up the new cable, then attached the rubber sealer thing.

    Rubber thing right bottom corner, new pump in place
    View attachment 15046

    Connecting the wires
    View attachment 15041

    More duct tape.. just because.
    View attachment 15043

    Ready to go!
    View attachment 15048
Thanks to Piddi and Jeetu2k for these posts, also Mrcheesbrough for the microswitch detail. They have all helped me diagnose my tap problem. It all took longer than I'd hoped, but we now have running water again courtesy of a new pump and cleaned out microswitch.
 
Ok guys, as promised, here's my DIY, inspired by jeetu2k.

Before I got the new pump from ebay, I bought a multimeter and checked that there was actually 12V at the pump, like jeetu2k explained.

As it turns out, the reason why my pump was broke, was some plastic (wrapping stuff) stuck in it.

So beware when you fill your tank!


This is the exact pump i got:

http://www.ebay.com/itm/CARAVAN-MOTORHOME-12V-SUBMERSIBLE-WATER-PUMP-COMET-VIP-PLUS-20L-PER-MINUTE-NEW-/181992652364?nma=true&si=WZUPJ26eGq9g1uVrSKfgPiSfT%2FQ%3D&orig_cvip=true&rt=nc&_trksid=p2047675.l2557


Here are the tools I used:

To create tool for water tank lid opening:
  • Regular broomstick
  • Hex Bolts M8 x 45mm
  • Drill (only drilled 6mm hole to make them stick!)
  • Wrench for bolts
  • Duct tape
Warning! The first attempt broke the tool, so I had to create a new one wrapped in duct tape (for reinforcement). That's how stuck the freaking lid is...

For the rest:

  • Small flat screwdriver
  • Diagonal pliers
View attachment 15034


Step by step:

  1. Unplugging the old pump and water level gauge

    Pretty straight forward, unclip the two connectors.


  2. Removing water tank lid

    Not easy, as mine was more or less stuck. Had to make two versions of the tool to finally force it open.

    As you can see, the one without duct tape simply broke.

    View attachment 15038


  3. Cut wires from old pump and keep connector

    Remember to keep some extra wires, so you have enough to connect a terminal block to it (grey plastic thingy i've attached at the end there)

    View attachment 15044


  4. Loosen water hose
  5. Remove old pump

    Old vs. new pump - exactly same size and details.

    View attachment 15045

  6. Place new pump and connect water hose
  7. Connect wires

    This is a little tricky, especially getting the new power cables from inside the water tank and out. This is because there is a rubber sealer thing there, that is very tight.

    I just removed it, created a little "fishing line" with some of the cable from the old pump, and fished up the new cable, then attached the rubber sealer thing.

    Rubber thing right bottom corner, new pump in place
    View attachment 15046

    Connecting the wires
    View attachment 15041

    More duct tape.. just because.
    View attachment 15043

    Ready to go!
    View attachment 15048
Pump replaced as per your instructions, back in business :) . Many thanks for your great post. Peter
 
It only fits one way. I think that, from 9 years of use, its become hardened/lots its spring. With the lever in the normal position the water will come on when I lever up but doesn't turn-off in lever down. If i rotate the lever towards me before fitting so it starts in a lower position (i.e. the catch inside the lever is the wrong-side of the switch) then it all works fine - just in reverse (i.e. down to tun on).
Did you put in the microswitch the wrong way around?
 
I've just replaced the microswitch for the tap in my 64 plate SE. My, more mechanically adept brother, helped me perform the task. After reading posts on this excellent forum, I decided to pay the princely sum of £4.50 and order the part rather than stump up £150 for a new tap (it seems VW won't just replace the micro switch). Reading other people's experiences and looking at some handy photos gave me the confidence to have a go. However, there are a few pointers I'd like to make...
Turn tap on and prise off ( carefully ) lever was fine.
Extract microswitch with screwdriver and then replace- no chance. We had to take of the tap and perform the removal and refit on a table. The plastic nut tightening the tap to the stainless steel sink is not easy to get to. You will also have tounclip the power and pull off the hose.
We ended up cutting the wires from the clip as we didn't want to disturb it and soldered on new wires from micro switch. We made a note which way round to position it as it's easy to lose your bearings!
The re assembly was quite straightforward and it fired up first time. We now have water!
I'll probably try and install a relay (as suggested) as that seems like a sensible idea.
That's a project for another time.
It's a fiddly replacement and I certainly needed the help, but it was immensely satisfying.
This is obviously a weakness owing to the number of owners complaining of issues. A skilled mechanic with all the tools would have the micro switch replaced in easily an hour. It's crazy to expect owners of such an expensive vehicle to have replace the whole tap!
 
Just replaced my pump so many thanks for the sets of excellent instructions above. The main difficulties I had were:
1) getting the lid of the tank. Even with a tool this was really hard and I ended up gently tapping with a rubber mallet and socket extender.
2) like so many jobs, access is fiddly. Firstly to get the lid off, then particularly to feed the cable of the new pump through the tank top.
The tips and photos above were really helpful - thanks again.
 
Looks like “curve in” is correct. Mine is curve out because I obviously put it back wrong, but it still works :)
So I removed the leveler and the “bow” poppes out. Pump starts when touching the remaining metal parts. I managed to get the bow back in place after using sand paper on the two connecting things. Water came out of the sink, but the pump didn’t stop. Seemed like the connecting things still were connected. So took off the leverer again and tried to rearrange the bow and put the leverer on a hundred times but never managed to both have the bow in place and water arriving and getting the pump to turn off. In the end everything died (some sparks from now and then), and no more pump or water. Any suggestions on what happened and on what I should do next?
 
Check the 5A fuse under the passenger RHD/driver LHD seat, if not blown clean the tap contacts again and assemble correctly as per previous post photos.
 
Last edited:
I would still have the same problem, the pump is on continuously because the bow causes the two connectors being connected. Which is what happened before the fuse (probably) broke.
 
Might be worth buying a new tap then you don’t need to touch the micro switch. You can buy them in the Club Shop at a very reasonable price.


Sent from my iPhone using Tapatalk
 
Might be worth buying a new tap then you don’t need to touch the micro switch. You can buy them in the Club Shop at a very reasonable price.


Sent from my iPhone using Tapatalk
No stock in the shop :(
You can also get the switch from eBay ...
 
Thank you for this post. Have carefully and successfully changed the water pump thanks to your clear explanation.
 
Our pump didn’t work when we got to site yesterday, are the fuses (5 amp) bog standard car fuses, like you get at halfords?? Thanks
 
Hello everybody,

I'm here with yet another waterpump problem, Vw Cali t6.1.
just over a year old, suddenly the water pump stopped working.

When i open the tap the water flows and than suddenly stops, with a warning on the control panel.
Saying waterpump error, go visit workshop, when I click ok, i can retry , again water flows for a random period (short) and than again same error.

Just before i encountered this issue, i had the cali at the dealer to fix the fridge, the lid kept popping open. As I understood they had to remove the entire fridge to replace the locking mechanism.

But because the pump was making weird sounds, my first guess was the waterpump.

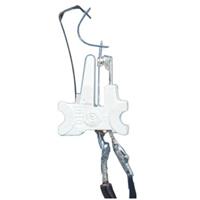
So yesterday i replaced the pump myself because it's a cheap fix and didn't wanna take it to the dealer. And what do you guess? Indeed that didn't solve the issue.
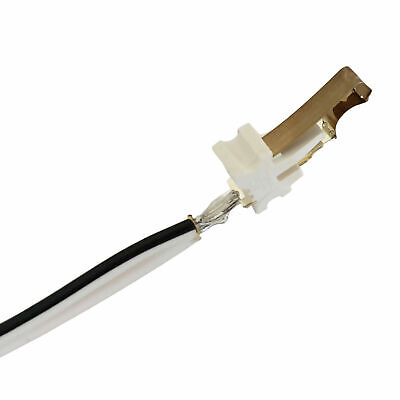
I also checked the switch at the tap, by short cutting it, so the pump engages.
Same issue after a second or so.

I also checked for an air lock, the first time the water sputters, and the moment it starts flowing , the error occurs. So i blew some air through the water tap untill i could here bubbles coming from the watertank. Followed by sucking water from the water tap until it reached the tap. I than closed the tap, hooked up the power to the pump again. But still no progress.

Also tried locating the fuse for the waterpump, but never succeeded in finding it, undid all the fuses from below the seat, but it still kept pumping. Is the fuse maybe located in the dash?

My only guess now is that by removing the fridge at the dealer, they might have 'touched' something (wire?) and that it's an electrical problem?

I also wonder how does the control unit detect that their might be an issue with the pump?
Does it measure the amp's or something like that? Or is there a flow meter somewhere?

Any help would be greatly appreciated.

Greetings
Leo
 
Back
Top