Buy all your VW California Accessories at the Club Shop Visit Shop

Fixing my footwell leak

Great call. You’re becoming a bit of an expert on repairs @Lambeth Cali :)
Better me than VW engineers!
I promise I’m not deliberately breaking things.

I go through stages with faults

Shock & Denial
Pain & Guilt
Anger & Bargaining
Depression and Reflection
The Upward Turn
Working Through
Acceptance & Relief

I have to say, a leaking van is the worst!
 
Last edited:
So as docbob suggested, the passenger side drain tube that runs from under the roof, down the A pillar, into a rubber grommet and into the scuttle behind the battery, under the bonnet and then drains into the front wing and dribbles out of the wheel arch, had come disconnected. I hope having reconnected this and squeezed some water through it and see it appear in the scuttle, that my leaking van is now fixed.

My van is a 2008 T5.

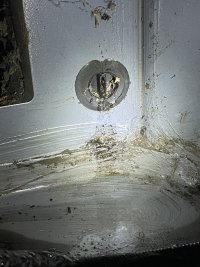
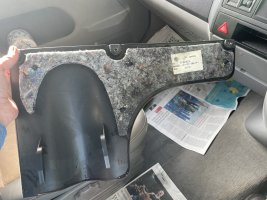
I removed the panel under the dash in the footwell. This has wool sound insulation and half of it was dripping wet.
2E8FE5F8-BFDE-40AE-AB1D-6FB8E06E6568.jpeg

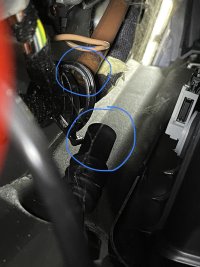
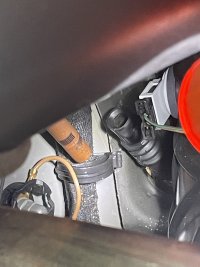
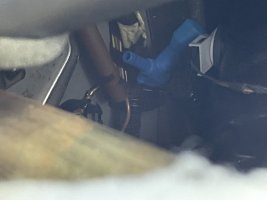
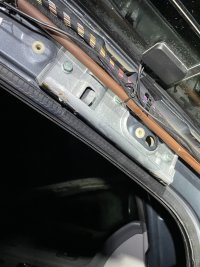
If I lay in the footwell and looked up I could just see what looked like the brown tube and the black rubber grommet that goes into the bonnet drain point. This was impossible to get at as docbob said.
1A92866C-F94E-4B63-AC4B-DDDF801EA537.jpeg

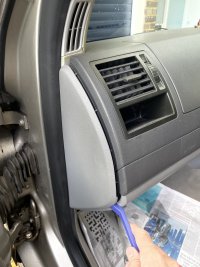
I removed the side panel but that didn’t help me. Docbob has a different van to me.
6B559487-5089-49CA-A94D-CC97FB3DE988.jpeg

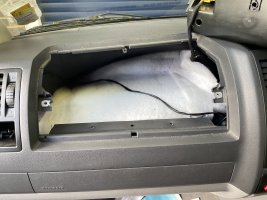
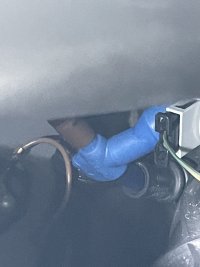
I then took the glove box out. The T5 only has one. This allowed me to see the problem better and actually access it pretty well. I mean it is tucked into the body work, and not easy to see how I was going to re-join them. It is down in to the left from the glove box. It was immediately clear neither had any slack so some extra tubing as Docbob suggested was going to be necessary.
6AF10B2E-E578-4844-9C0A-BC897474AE1E.jpeg

0F0E4070-5ECC-40DF-8D20-D0A61C3BAD97.jpeg
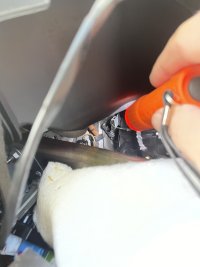
I tried the thin tube that came with the huge syringe I had ordered and wondered about copying what Docbob did but the tube seemed too narrow and wouldn’t squeeze through the black grommet into the scuttle area like his picture in his post.
37BCEFA3-F88F-4F95-81E5-9D5AF9CC0F20.jpeg

99A91340-1C32-46C9-8DB1-4BEF84222E53.jpeg

I went looking for some better tubing. I then found some that was the same width as the brown tube.
 
Last edited:
well done, don't forget Germoline to all the cuts on hands and wasn't it fun!!
Who says the Germans have no sense of humour.
 
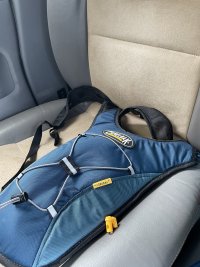
So I found an old Camelback that I’ve had for years and never used.


917B2BB6-DE68-49C0-AC67-A09C5522E78D.jpeg

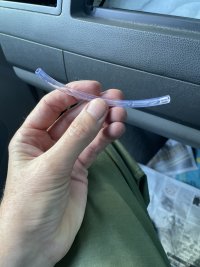
I cut a bit off and thought it might work but how would I get it to connect? It fit into the grommet well but was the same size as the brown tube, about 8mm diameter.
FC10DAC6-5CC7-49D0-92D5-75E0A82F0388.jpeg

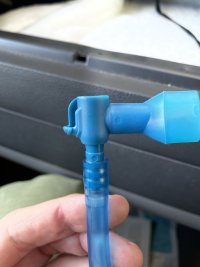
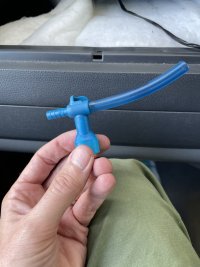
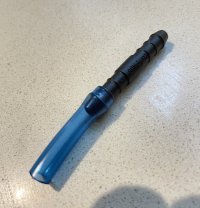
Then I went back to look at the Camelback and cut off the connector. I tried connecting this. It was too long. Shortened it.
53B57ECD-0751-4584-85B0-CD3654419917.jpeg
Pulled off the connector and switched it around.
DC36817E-AD27-469C-97AD-6C260AF8E4DD.jpeg

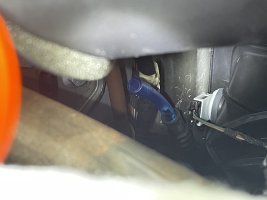
Connected it to brown tube perfectly but it wouldn’t go in the black grommet. Pushed it in the grommet first and then the brown tube and that worked.
9D2F1F89-D4B4-47AA-9687-535DB7049EDE.jpeg

5225A0FD-8DB7-4843-8894-7E2F331DDE4B.jpeg

I raised the roof and with the syringe, squirted a 300ml of water down. No leak. Thought that’s not a good enough test, so raised bonnet and removed scuttle cover again. Squirted another 300ml and saw water exit the valve. This is the other side of the black grommet.
E51FDDDC-B1E6-4995-96B8-23254D5A941D.jpeg
Fixed?? I hope so.
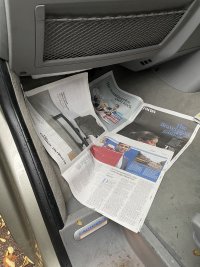
I left some paper out in the footwell to see if it drips anymore. Fingers crossed. Of course it’s now stopped raining.
6A36C4F3-574D-4FCC-949C-A5ACD1E34CC5.jpeg

Thanks to Docbob. I would have taken a long time to find that tube. Apologies for many pictures but I find it makes things much easier to understand.
 
Last edited:
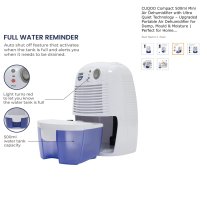
The dehumidifier arrived as I was fixing. Hopefully it’ll help.
CUQOO Compact 500ml Mini Air Dehumidifier with Ultra Quiet Technology – Upgraded Portable Air Dehumidifier for Damp, Mould & Moisture | Perfect for Home, Bedroom, Garage, Office, Caravan & More https://amzn.eu/d/0VBRYNs

A0542DC6-F8EB-4828-9115-1020ADAC4999.jpeg
 
Last edited:
Do you know the approximate internal diameter of :
1)brown pipe ?
2) black spigot ? (Assume outside diameter of brown tube; size ? )

outside diameter of the pipe you used for the repair ?

did you apply any sealant to the spigot to seal it off against the inserted pipe ?

may help others in future.

About 8 or 9mm brown and blue tube external diameter.
No sealant. Desirable but very tricky.
 
Do you know the approximate internal diameter of :
1)brown pipe ?
2) black spigot ? (Assume outside diameter of brown tube; size ? )

outside diameter of the pipe you used for the repair ?

did you apply any sealant to the spigot to seal it off against the inserted pipe ?

may help others in future.
I imagine something like this might work well
18674DE0-BBFE-4C7E-A00F-A798B37C1DE3.jpeg
 
There are too many threads on here on this issue!
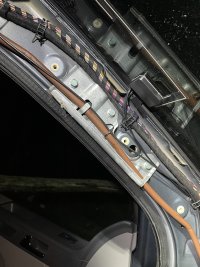
On another thread I posted these photos from mine. I found that a previous radio fitter had incorrectly clipped the down pipe too high. Thus pulling it out of the elbow and leaving insufficient slack to reconnect.

Once correcly repositioned, the elbow could easily be reattached down to the markings.

Hope this helps.
Bad
E7A593EC-29F3-4AF5-8BBF-C5E37C4E3F75.jpeg
Good!
76471F91-5DEC-4C91-A5AE-D00BC9642268.jpeg
 
My van was bought new, (2018 T6) no interference by anyone to factory build and still the downtube was disconnected. This is a production quality fault or a basic design fault
 
My van was bought new, (2018 T6) no interference by anyone to factory build and still the downtube was disconnected. This is a production quality fault or a basic design fault
I’d agree - certainly not the finest of design solutions.
I’m guessing though that it doesn’t have sufficient warranty costs accumulated to necessitate a design revision.
 
I’m guessing though that it doesn’t have sufficient warranty costs accumulated to necessitate a design revision.
If that was the common sense yardstick, you would think that they would have redesigned the factory fit sliding windows in about 2005. Many many stories of people having the whole window panels replaced, 3 times, under warranty in an attempt to fix the leak.

I can only assume that there is no-one with common sense looking at things like this at VW
 
The dehumidifier arrived as I was fixing. Hopefully it’ll help.
CUQOO Compact 500ml Mini Air Dehumidifier with Ultra Quiet Technology – Upgraded Portable Air Dehumidifier for Damp, Mould & Moisture | Perfect for Home, Bedroom, Garage, Office, Caravan & More https://amzn.eu/d/0VBRYNs
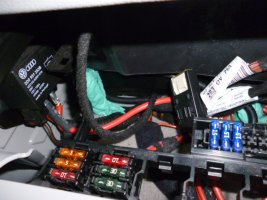
I suspect as your leak was same as mine, the water will pool under front seats (assuming T6 and T5 similar floor pans) More so on passenger side.
I sped up drying process by rotating passenger seat 180 degrees and drivers seat fully forward which gives better access to the undercarpet area where the wiring harnesses passthrough. I made up cigar type rolls of absorbent tissue (strong stuff that doesn't turn to pulp when wet so you can pull them out when wet). Amazing how you need to replace every few minutes initailly. Now day 3 for me and it takes 6hrs for rolls to become saturated despite carpet feeling fully dry. Seems to wick the water out of undercarpet sound proofing which is very absorbent like neoprene rubber.
 
Oddly I used our Dyson on full blast and it collected a lot of water. A good few centimetres.
I left the mini humidifier on all night and it seems to have collected probably 75ml. The van is in the sun now so that might aid condensation and dehumidifier.

The worst bit has gone from drenched to damp quite quickly. There was a full downpour last night and all looks well. Fingers crossed.

I haven’t looked under the seats yet!
 
To assist drying the van inside open all doors to get as much through breeze as possible,
the outside air, even in winter the air is far dryer than an enclosed space, the wind action will hasten the drying process.
when you close the van up again, use the dehumidifier
 
I suspect as your leak was same as mine, the water will pool under front seats (assuming T6 and T5 similar floor pans) More so on passenger side.
I sped up drying process by rotating passenger seat 180 degrees and drivers seat fully forward which gives better access to the undercarpet area where the wiring harnesses passthrough. I made up cigar type rolls of absorbent tissue (strong stuff that doesn't turn to pulp when wet so you can pull them out when wet). Amazing how you need to replace every few minutes initailly. Now day 3 for me and it takes 6hrs for rolls to become saturated despite carpet feeling fully dry. Seems to wick the water out of undercarpet sound proofing which is very absorbent like neoprene rubber.
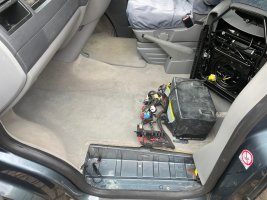
Did you remove the battery?
Under my passenger seat full of battery and fuses. Barely room to move.
Currently just using dehumidifier only.
 
No, like you, too much electrical gubbins to take out. Luckily carpet doesn't seem to go under battery.
If you look carefully you will see two places where roll can be pushed through into void below carpet.
The 'green rolls' show their position.
It certainly has worked as overnight only left side still absorbing moisture and then no longer saturated.
Under drivers seat in my van is a largish flap of carpet that can be folded forwards to get much better access such that large wads of roll can be pushed under. This side now fully dry.
5 days ago you could paddle between front seats!!

P1030299.JPG
 
I currently have my passenger seat and seat base out for drying purposes. I just couldn’t get close enough to ‘between the seats’ with it all in place.

It’s a bit of a faff with a few security torx screws needing removing.

I was concerned about that central section being wet but thankfully it was bone dry under there. Just leaving it all open whilst these storms do their worst to be sure all leaks are fixed!

Seat reconnected in photo so I could re attach battery (vehicle) without it flaggaing an airbag fault!

732BE2E7-5BA9-440F-BCC3-24A4B8057CFF.jpeg
 
I currently have my passenger seat and seat base out for drying purposes. I just couldn’t get close enough to ‘between the seats’ with it all in place.

It’s a bit of a faff with a few security torx screws needing removing.

I was concerned about that central section being wet but thankfully it was bone dry under there. Just leaving it all open whilst these storms do their worst to be sure all leaks are fixed!

Seat reconnected in photo so I could re attach battery (vehicle) without it flaggaing an airbag fault!

View attachment 101415
Yeah I’ve removed the seat (but not the base) before, to disconnect battery when replacing roof sensors a couple of years ago. I’m just a bit loathe to do it again.

There’s a touch of fingers crossed attitude to me believing the van will dry itself out. It surprising how much you can cling to the belief in a £35 dehumidifier and hopefully a naturally wicking polyester carpet!?

I mean the water is definitely slowly appearing in the tank. V slowly.

But when I put my hand on the carpets they are remarkably dry. I’ve stopped worrying it’s all rusted under there.
 
Today, none of my paper rolls were wet so I believe I am finally dry in undercarpet area. No water ingression despite violent downpours!!
 
Back
Top