How to Replace Roof Sensors

Update on roof repair (fault code 1000):
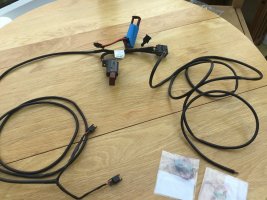
I bought 4 x sensors to replace them following @Lambeth Cali instructions, but I just couldn’t get the roof to open to allow me to do the fix. So I booked into my local VW dealer to see what they would say.
I asked them their process and in fairness told me that fault code 1000 was going to be sensor related. Which I pretty much knew thanks to this forum.
On confirming this during their investigation I then had a choice:
1. Have to buy the full roof harness (£270+vat) and have it fitted + 15 hrs labour (£95 + VAT per hour)
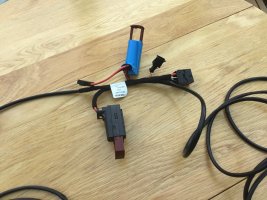
2. They would snip the sensors off the harness and splice them into the old harness + 3 hrs labour.
No brainier price wise - but they refused to use any of the 4 x sensors I had purchased. It only required 2. Or tell me how they got the roof up - not that I fancied fiddling with the motor, etc..
In total it cost me £710. Roof works perfectly.
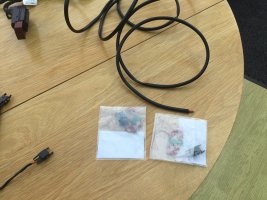
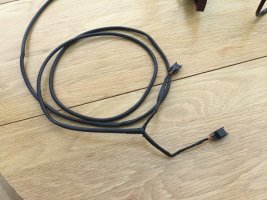
So if anybody wants to buy a harness with 2 sensors and another 2 separate sensors let me know!

Main thing is we can get out this weekend without walking with a hunch after it.
 
Last edited:
Getting it working is always the most important thing. And of course swerving the £2000 option 1. I wonder if they would have offered option 2 if you hadn’t looked like you had an idea what the fault was.
 
Update on roof repair (fault code 1000):
I bought 4 x sensors to replace them following @Lambeth Cali instructions, but I just couldn’t get the roof to open to allow me to do the fix. So I booked into my local VW dealer to see what they would say.
I asked them their process and in fairness told me that fault code 1000 was going to be sensor related. Which I pretty much knew thanks to this forum.
On confirming this during their investigation I then had a choice:
1. Have to buy the full roof harness (£270+vat) and have it fitted + 15 hrs labour (£95 + VAT per hour)
2. They would snip the sensors off the harness and splice them into the old harness + 3 hrs labour.
No brainier price wise - but they refused to use any of the 4 x sensors I had purchased. It only required 2. Or tell me how they got the roof up - not that I fancied fiddling with the motor, etc..
In total it cost me £710. Roof works perfectly.
So if anybody wants to buy a harness with 2 sensors and another 2 separate sensors let me know!

Main thing is we can get out this weekend without walking with a hunch after it.
Glad it's fixed. A set of pictures of the harness and even better if you can work out what wires go where might aid others in future.
 
So which sensors were replaced? 2 on which side of van? How did they know they were the faulty ones? I wonder if they had a diagnostic test.
Both front ones. They said they could test to see which ones were faulty - I wasn’t convinced.
But it’s done.
 
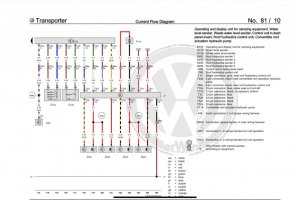
I must admin I am surprised how many connectors there are on the loom. Be good to take it apart (figuratively) and work out what is connected where.

4 sensors looks like 3 wires each side (1 power plus 2 signal returns) - so theoretically a 6 pin connection at a plug end.

Pump motor connection is a single 12v feed where polarity is reversed to reverse direction , not sure what the rest of it is for. Shame we can't see what plugs into what .

I need to lift my roof up and properly examine this - shame the VW diagnosis doesn't give you a code for sensor readings - that would be immensely useful. I would expect each one to return a 1 or 0 (or failure) so the unit should know that something like

front 2 sensors = 1 and back 2 = 0 means roof up
front 2 sensors = 0 and back 2 = 1 means roof down (might have these the wrong way round)
anything else, particularly front and back =1 means error

If you could read the values and then understand them you should be able to pinpoint the faulty unit.
Or it could be as simple as if the roof refuses to raise it is always the front sensors...
The issue with the Cali roof ECU is that it added on as part of the conversion. All the standard T5/T6 ecus you can read part numbers, fault codes, channels etc as they are connected to the vehicle network, the roof isn’t. So all the faults you can get out of the roof ECU are via the roof control module and are a lot more high level and not specific. From my digging around the roof ECU is actually the same hardware as SAAB & OPEL convertibles and from what I can determine on those cars it is connected to the their vehicle networks and you can do a lot more diagnostics, ie determine exactly the sensor that is faulty and in theory drive the pump via diagnostics routines and bypass the sensors. I have had a little play with this but trying to get hold of aftermarket GM diagnostics software isn’t easy (well free) and whilst the hardware appears to be the same, the software is different due to the roof operation. I was hoping that there might be a way to use GM diagnostics on the controller and save Cali owners a lot of time and money, but we will see.

The way two wire hall sensors work is they have two different states which means they pass different currents through them rather then being like a traditional switch so they are incredibly difficult to diagnose without the ECU, in theory you could use a current clamp or put a good multimeter in the sensor circuit, but the values are very small and vary with voltage, so it is one of those yes in theory but ….
 
I have a couple of hall sensors here that @Lambeth Cali sent me - I am to try and work out what is "normal" , current wise. Of course I don't know which one , or both is faulty :) but should be able to get an idea. I can rig a circuit up or hook it to an arduino and a crude scope. when I get time, which is my problem!
 
I have a couple of hall sensors here that @Lambeth Cali sent me - I am to try and work out what is "normal" , current wise. Of course I don't know which one , or both is faulty :) but should be able to get an idea. I can rig a circuit up or hook it to an arduino and a crude scope. when I get time, which is my problem!
Go with LOW being ~15mA at 12v and HIGH being ~3mA at 12V as a going in point. However the roof ECU will have some sort of Hall effect output circuit that will control the current, so I would go with using that as a starting point, I bought a roof ECU from eBay for ~£20

edited: just another thought, given the issue is probably with the sensor magnets no longer being magnetic as they have rusted. Perhaps placing a powerful magnet on top of the sensors could be used as a quick check, ie you might be able to see the roof status change
 
Last edited:
edited: just another thought, given the issue is probably with the sensor magnets no longer being magnetic as they have rusted. Perhaps placing a powerful magnet on top of the sensors could be used as a quick check, ie you might be able to see the roof status change
I had the same wonder in a different thread but using a block of iron like a hammer head - be interesting to see the "normal" behaviour and whether it can be influenced with magnets or a lump of metal, it might be enough to trick the sensors into thinking situation normal to at least allow the roof to be opened. Just need to understand what "normal" is :)
 
Go with LOW being ~15mA at 12v and HIGH being ~3mA at 12V as a going in point. However the roof ECU will have some sort of Hall effect output circuit that will control the current, so I would go with using that as a starting point, I bought a roof ECU from eBay for ~£20

edited: just another thought, given the issue is probably with the sensor magnets no longer being magnetic as they have rusted. Perhaps placing a powerful magnet on top of the sensors could be used as a quick check, ie you might be able to see the roof status change
They were all still quite magnetic. Even the completely rusted one could be placed on a radiator and would stick.
 
Just another note. The sensors had numbers on which implied they had to be placed in a specific order. I suppose that also could have been due to length of different bits of the loom.
 
@Lambeth Cali did I read on another post of yours that you dont have to disconnect the starter and leisure batteries? Or should you always disconnect the starter and the ‘under seat’ leisure batts?
 
I hope you all don't connect the sensor wires by just twisting them round each other, or solder them down.
You really need to make it waterproof. I hope you all use something like this:
smeltbus.jpg
You clamp the wires on each side of the tube, then you heatshrink the tube, and so you make a decent connection (you can pull both wires, and they should stay in place), and with heating the tube, some glue melts around the wire, making it waterproof.
 
IMG_1165.jpeg
IMG_1164.jpeg

Forgot that I had this warning in March.
I hadn’t used the Cali for 3 weeks.
I’m thinking there was a software update.
Haven’t opened the roof in 5 months.
Switched it all off.
Left it off for 10 minutes.
Switched it back on and tried to open and shut roof.
Didn’t work.
Set the message back to English.
Switched off.
Locked up.
Left 10 mins.
Back in. Switched on, message still on.
Started up and drove round the block.
Switched off. Left off 10 mins.
Back in and switched on, message gone and no warning lights.
Weird huh.
Hasn’t done it since.
 
@Lambeth Cali did I read on another post of yours that you dont have to disconnect the starter and leisure batteries? Or should you always disconnect the starter and the ‘under seat’ leisure batts?
I did all three. That’s what took a lot of the time.

Possibly somebody else suggested disconnecting the controller instead. Not sure if that would work.
 
Last edited:
I hope you all don't connect the sensor wires by just twisting them round each other, or solder them down.
You really need to make it waterproof. I hope you all use something like this:
View attachment 122752
You clamp the wires on each side of the tube, then you heatshrink the tube, and so you make a decent connection (you can pull both wires, and they should stay in place), and with heating the tube, some glue melts around the wire, making it waterproof.
I twisted them together. The original set up is very amateurish to be honest. Quite surprising. Just tape wrapped around. Because they rest on top of the rams they shouldn’t get wet but obviously they do break, but it’s the sensors that get wet and rust rather than the wiring.
 
Below is a picture of the rear sensor before I touched it.
View attachment 78720The blue arrow shows the front hose that is looped around the back of the hydraulic ram. This can be unclipped which makes it easy to twist the hose to replace the front sensors. You can see the rear hose directly above the rear sensor with “2” on it. Even removing this is difficult. You will probably destroy it getting it out. It was suggested to me that I didn’t want that hose to pop out or bad things would happen. The good news is they seem to be securely fitted.
When I got it out and started to remove the electrical tape I found that this wiring was more complicated. There were still two wires going to the sensor but there were connectors under the tape with two wires joining into one before going to the sensor. This meant a little care was needed about where I was going to make my join.
View attachment 78724

I cut the wire and put some tape around the first 10cm of the new sensor and cut and stripped the wires ready to connect.

It became clear that the only way I was going to be able to get the new sensor in, was to snap off the bits of plastic you can see above either side of the “2” and slide it in from the back. After these plastic clips were snapped I also needed to use a sharp pen knife to really remove all the remaining tiny bits of plastic where I had snapped them off. This might not seem great but I assure you when these sensors are in place there is no way they’re ever coming out. Here you can see I tried to get it in with one piece of the clip removed but it would not work.
View attachment 78721
With both bits removed and trimmed with a sharp knife, it was possible to push it through from the back.
View attachment 78722
You can see that with the rear clips remaining and the plastic bit where the wires are, in the central channel it’s not going anywhere. I then connected the wires and covered in tape as before.

After doing the two rear sensors I finished with the front one. Here you can see how much easier it is to move the hose out of the way.
View attachment 78725

This sensor wasn’t rusted but was covered with a white crystalline dust that suggested some corrosion or reaction. I cleaned this all away.
View attachment 78726

The final job before the plastic cover goes back on. Reasonably tidy and not that dissimilar to how it was.
View attachment 78727

I now made sure I hadn’t left any screwdrivers etc on the roof and reconnected the batteries.

(When I reconnected everything after replacing the first sensor, at the end of day one, there was a few worrying electrical shenanigans. The engine wouldn’t start first time; the control unit was flashing and wouldn’t give me the main menu until I set the clock; error 7001 came up which means loss of power. I think my ignition often doesn’t like starting until I’ve jiggled the steering wheel and engaged the steering lock. Eventually it started, but, as I said before, replacing the one sensor didn’t work. I plugged the van in overnight which cleared 7001.)

So after replacing the other 3 sensors and reconnecting the batteries I plugged in to the mains to make sure all was charged. I then went for a walk for an hour, contemplating success and failure. With it looking like it was about to rain I was forced into seeing if it had all worked. I think I had to set the clock again. I checked diagnostics but no errors this time. I turned the key and lowered the roof. The van made the usual 3 noises and the final locking one suddenly stopped. Like it should! The first time in months, it was back to normal. Success!! The roof down symbol was there.
View attachment 78728
I went for a drive to make sure the chimes wouldn’t reappear. They didn’t.
One odd quirk of the roof thinking it’s up, is that you can’t turn off the control module. I checked this and it turned off, so again, everything was back to normal.

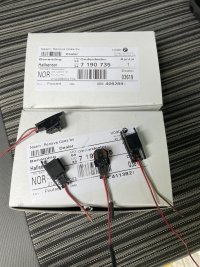
So the 4 sensors cost me €100 on eBay and I spent about £30 on some tools. The sensors are now £58.67 for 4 from bmwsupply.co.uk. I’ve just ordered another 4 as my van is a 2008 T5 and I can I imagine having to do this again sometime, ten years from now.
It took me 6 hours to replace the first sensor but an hour was lost borrowing a spline socket to remove the seat, it rained for an hour and several people wandered past and engaged me in conversation. The first attempt was quite fiddly and without the wire stripper, which was an absolute life-saver. The number 2 slot was great for stripping the very fine wire. The second day I replaced the other 3 sensors in 4 hours.

View attachment 78729
I’ve heard it suggested a VW roof loom costs £150-£250 just as a part. The labour charges could send this upto £3000, depending on the dealer.
If there was a great dealer near me, I would have ‘happily’ have paid them maybe £600-£1000 to fix this. I love our van and will always pay whatever to have it maintained properly. I wouldn’t however, want to pay a dealer £3000 to pull out the roof lining for no good reason and generally fumble about.
In all honesty I am still amazed I fixed it!
Well done, even if it has been a while. Very comprehensive report. I just got the price from my Norwegian dealership. They are asking for 750 GBP for the sensors, labor comes on top. I think I want to order the BMW sensors, like you did. They cost 19 GBP per sensor. Anything else I should consider?
 
Well done, even if it has been a while. Very comprehensive report. I just got the price from my Norwegian dealership. They are asking for 750 GBP for the sensors, labor comes on top. I think I want to order the BMW sensors, like you did. They cost 19 GBP per sensor. Anything else I should consider?
I presume you have a soldering iron and heat wrap would be worthwhile. You don't have to use solder etc but it does do a good job.
 

Similar threads

Back
Top