How to Replace Roof Sensors

Lambeth Cali

Lambeth Cali

Top Poster
VIP Member
Messages
1,687
Location
London
Vehicle
T5 SE 174
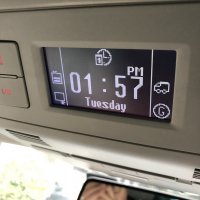
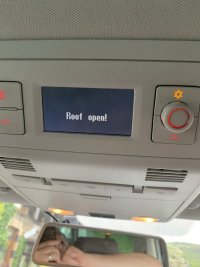
My roof has over the years occasionally said it was up when it was down. I‘ve owned it from 2009 and know the sound it makes when closing so have ignored this. I think last summer this finally became worse. Coincidentally after last summer I decided I wanted to replace the control unit as the screen was now useless. The new replacement was a newer model and now chimed when I was driving with the “Roof Open”. This was annoying. Also at Easter the sound of the roof closing changed. I would say my roof makes 3 different sounds when closing. Now the final noise didn’t stop but just kept repeating as if it was trying to lock but something wasn’t finishing. Where the noise used to stop by itself and then I’d take my finger off the button, it just kept going.
I started to read the dozens of roof posts and decided the 4 hall sensors might be the problem. When I read that these were available to buy for £15 (BMW part number 54347190735) I decided to give it a go and swap them. My van is serviced at Peter Norris a VW specialist in South London. They wouldn’t do anything non mechanical and I don’t trust any of my local dealers. It seems likely they would have replaced everything in the roof leaving me with a bill between £1000 to £3,500, mainly for labour.

You will need
I bought 4 sensors off eBay which came from Lithuania although I see you can get them from bmwsupply.co.uk (I’ve just ordered 4 more as parts). Part 54347190735
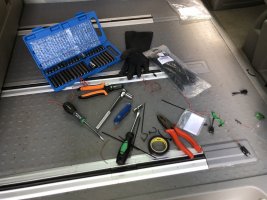
81B1057F-A997-490C-A4DE-CA6396C81819.jpeg

A torx screwdriver TT25

A basic socket set (I found one in our garage that apparently belongs to my wife)

A spline socket set
https://www.amazon.co.uk/dp/B010K5A5PO/?tag=eliteelect-21

Wire trimmer
https://www.amazon.co.uk/dp/B083LKTZXT/?tag=eliteelect-21

Electrical tape
https://www.amazon.co.uk/dp/B08QHTZ2NR/?tag=eliteelect-21

Thin cable ties

Perhaps a pen knife and flat head screwdriver

First Raise the Roof

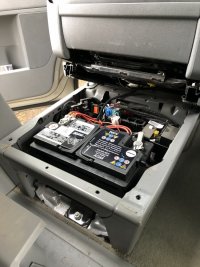
Second, Disconnect the 3 Batteries


I used part of Loz’s great instructions on how to disconnect the 2 leisure batteries and starter battery from his
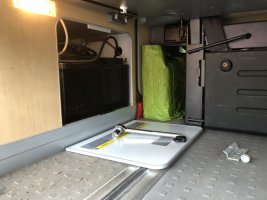
HOW-TO INSTALL DC-DC CHARGER TO REPLACE VW SPLIT CHARGE RELAY​

so I will skim through this bit. You just need to disconnect the negative terminal of each. I wore a rubber glove when touching terminals.
96E1269B-542F-439E-BB7D-CB6DBAD2E624.jpeg
The battery exhaust tube came off whilst doing this, so I reconnected.
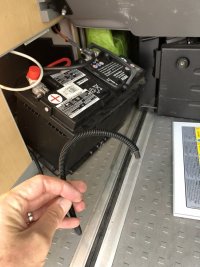
E14BE890-6BBD-4204-9807-0AC0275552FB.jpeg
You need the socket set and spline socket to remove passenger seat. 2 splines bolts at the rear and 2 normal 13’ bolts at the front.
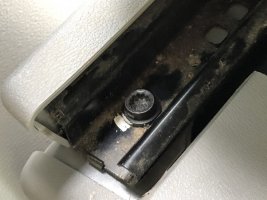
9C0512B5-D45A-4F6C-A92A-1C29CC4307CA.jpeg

3CE1582D-C4F8-4C35-88DD-58AA6C159590.jpeg
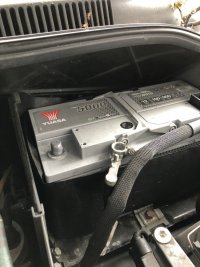
And finally the starter battery
4F80B5C9-A057-4AD9-A4B0-DBAA9CAB343A.jpeg

Now You Can Remove the Sensors
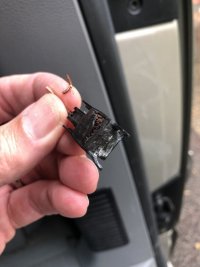
Remove plastic cover using TT25 torx screwdriver. It’s a torx screw at the front and it’s a kind of clip at the back. Very easy.
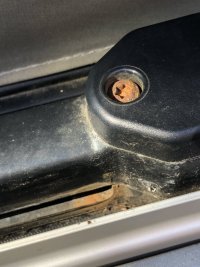
6D499385-F963-4EAB-8095-65B873FD8C1E.jpeg

Remove the Front Sensor
You are going to remove each sensor and cut the 2 wires and then insert your new sensors and connect the wires together and then wrap around with electric tape.

The front ones are easier so I would start with them. You need to twist the hydraulic hose out of the way and jiggle with the clips to get the sensor out. I used a flat head screwdriver and a pen knife to loosen the clips and push it up from below. It’s very likely that the clips might break but it’s a good idea to get an idea of how this fits as it will make it easier to put the new one in.
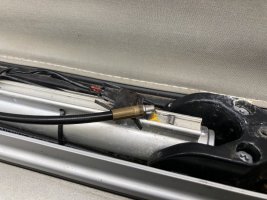
F3679BF6-6972-411B-9031-A8B3FD574BC4.jpeg
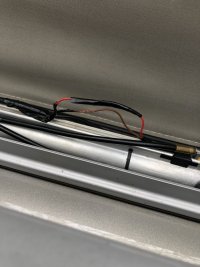
Cut the wire to remove it, leaving enough wire on the loom to connect to new sensors. I got better at this as I went along and by sensor 4 I think it was a tidy job.
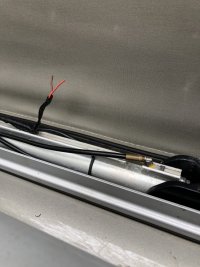
E7455EE3-9D1A-4248-8CCD-6DBA6C038431.jpeg
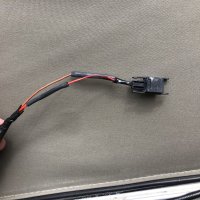
I learnt to prep the new sensor wiring before inserting it. I wrapped some electrical tape around the wires leaving the new sensor, probably 10cm and cut the wire at 20cm and trimmed off the plastic, ready to connect.
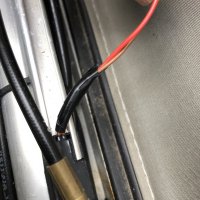
C3B924F7-D14E-498B-B2BB-C0B14521B60F.jpeg
Connect the wires together (I watched various YouTube videos about how best to do this, I didn’t solder anything just twisted wires together and then squeezed with pliers)

TBC, please don’t comment so I can put posts together
 
Last edited:
Part Two

I twisted the wires together and covered with tape. The wires are very thin and only have 7 thin strands. If you snip one or two when stripping off the plastic then you have little left to twist together. I covered the wires in 2 layers on tape each and then one more layer wrapping them together, roughly replicating what they looked like before. It’s likely you will have a bit more slack wire so it’s a good idea to work out how you’re going to zip them together tidily so you can get the cover back on.

34EB0764-0D32-4028-8629-E503A282E061.jpeg
E11B1D8A-5122-41DC-BDF3-F6890C34C38F.jpeg
This first sensor was visibly very rusted so I was hoping this might fix it. It had been raining and so I decided to pause, reconnect the batteries and see if this had fixed the problem. It hadn’t. This was disappointing but with encouragement from vwbob, vbk1975, Loz and Welshgas, I decided I would order some wire strippers and do the rest.
CC354EB3-318D-4E57-8195-C5812B8EFCDC.jpeg
It is worth mentioning that it’s not a good idea to start this with any rain forecast. Not only does this stop you doing the job, but as I found, you cannot even lower the roof or in my case, close the van door!

Day Two

The rear sensors are much more difficult to remove and then replace, but once you have worked out a technique it’s doable. The biggest problem I had was that the rear hose is almost impossible to move out of the way as it has no slack. The front hose has a loop at the back of the ram which if lifted mean you can rotate the front hose 180 degrees out of the way.
 
Last edited:
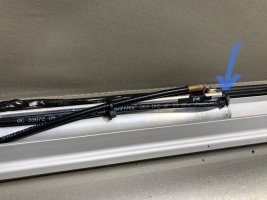
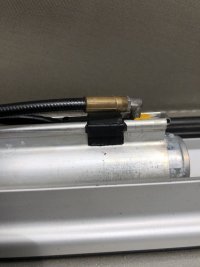
Below is a picture of the rear sensor before I touched it.
32F49288-C5EB-4F0E-9B48-5E7607D1802A.jpegThe blue arrow shows the front hose that is looped around the back of the hydraulic ram. This can be unclipped which makes it easy to twist the hose to replace the front sensors. You can see the rear hose directly above the rear sensor with “2” on it. Even removing this is difficult. You will probably destroy it getting it out. It was suggested to me that I didn’t want that hose to pop out or bad things would happen. The good news is they seem to be securely fitted.
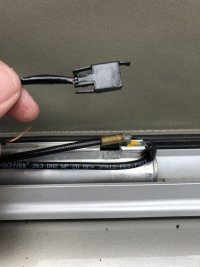
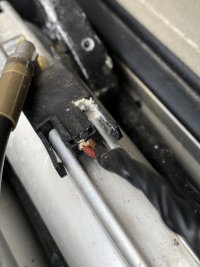
When I got it out and started to remove the electrical tape I found that this wiring was more complicated. There were still two wires going to the sensor but there were connectors under the tape with two wires joining into one before going to the sensor. This meant a little care was needed about where I was going to make my join.
38BA7B9D-1244-4FBB-A21B-938B90694BA6.jpeg

I cut the wire and put some tape around the first 10cm of the new sensor and cut and stripped the wires ready to connect.

It became clear that the only way I was going to be able to get the new sensor in, was to snap off the bits of plastic you can see above either side of the “2” and slide it in from the back. After these plastic clips were snapped I also needed to use a sharp pen knife to really remove all the remaining tiny bits of plastic where I had snapped them off. This might not seem great but I assure you when these sensors are in place there is no way they’re ever coming out. Here you can see I tried to get it in with one piece of the clip removed but it would not work.
58331280-F5D8-439B-8ABB-49E836377F31.jpeg
With both bits removed and trimmed with a sharp knife, it was possible to push it through from the back.
B54DE526-B5BE-4F40-9666-14599124ACBD.jpeg
You can see that with the rear clips remaining and the plastic bit where the wires are, in the central channel it’s not going anywhere. I then connected the wires and covered in tape as before.

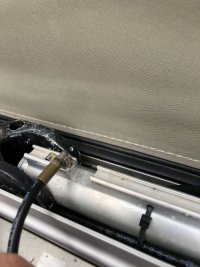
After doing the two rear sensors I finished with the front one. Here you can see how much easier it is to move the hose out of the way.
F2125692-7816-419D-9975-4615ED4CDB50.jpeg

This sensor wasn’t rusted but was covered with a white crystalline dust that suggested some corrosion or reaction. I cleaned this all away.
25271816-E893-477B-9799-75A53FA16D7F.jpeg

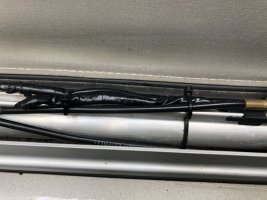
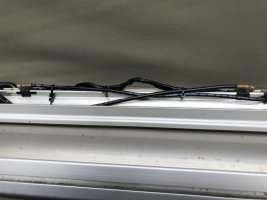
The final job before the plastic cover goes back on. Reasonably tidy and not that dissimilar to how it was.
62ED3489-89F9-4F0B-A6D3-151AB09DE6D7.jpeg

I now made sure I hadn’t left any screwdrivers etc on the roof and reconnected the batteries.

(When I reconnected everything after replacing the first sensor, at the end of day one, there was a few worrying electrical shenanigans. The engine wouldn’t start first time; the control unit was flashing and wouldn’t give me the main menu until I set the clock; error 7001 came up which means loss of power. I think my ignition often doesn’t like starting until I’ve jiggled the steering wheel and engaged the steering lock. Eventually it started, but, as I said before, replacing the one sensor didn’t work. I plugged the van in overnight which cleared 7001.)

So after replacing the other 3 sensors and reconnecting the batteries I plugged in to the mains to make sure all was charged. I then went for a walk for an hour, contemplating success and failure. With it looking like it was about to rain I was forced into seeing if it had all worked. I think I had to set the clock again. I checked diagnostics but no errors this time. I turned the key and lowered the roof. The van made the usual 3 noises and the final locking one suddenly stopped. Like it should! The first time in months, it was back to normal. Success!! The roof down symbol was there.
84AEBF5C-4F34-4C11-A136-A8A63B84DD71.jpeg
I went for a drive to make sure the chimes wouldn’t reappear. They didn’t.
One odd quirk of the roof thinking it’s up, is that you can’t turn off the control module. I checked this and it turned off, so again, everything was back to normal.

So the 4 sensors cost me €100 on eBay and I spent about £30 on some tools. The sensors are now £58.67 for 4 from bmwsupply.co.uk. I’ve just ordered another 4 as my van is a 2008 T5 and I can I imagine having to do this again sometime, ten years from now.
It took me 6 hours to replace the first sensor but an hour was lost borrowing a spline socket to remove the seat, it rained for an hour and several people wandered past and engaged me in conversation. The first attempt was quite fiddly and without the wire stripper, which was an absolute life-saver. The number 2 slot was great for stripping the very fine wire. The second day I replaced the other 3 sensors in 4 hours.

177103CD-B03C-48BD-905F-57717541D27F.jpeg
I’ve heard it suggested a VW roof loom costs £150-£250 just as a part. The labour charges could send this upto £3000, depending on the dealer.
If there was a great dealer near me, I would have ‘happily’ have paid them maybe £600-£1000 to fix this. I love our van and will always pay whatever to have it maintained properly. I wouldn’t however, want to pay a dealer £3000 to pull out the roof lining for no good reason and generally fumble about.
In all honesty I am still amazed I fixed it!
 
Last edited:
Below is a picture of the rear sensor before I touched it.
View attachment 78720The blue arrow shows the front hose that is looped around the back of the hydraulic ram. This can be unclipped which makes it easy to twist the hose to replace the front sensors. You can see the rear hose directly above the rear sensor with “2” on it. Even removing this is difficult. You will probably destroy it getting it out. It was suggested to me that I didn’t want that hose pop out or bad things would happen. The good news is they seem to be securely fitted.
When I got it out and started to remove the electrical tape I found that this wiring was more complicated there was still two wires going to the sensor but there was connectors under the tape with two wires joining into one before going to the sensor. This meant a little care was needed about where I was going to make my join.
View attachment 78724

I cut the wire and put some tape around the first 10cm of the new sensor and cut and stripped the wires ready to connect.

It became clear that the only way I was going to be able to get the new sensor in, was to snap off the bits of plastic you can see above either side of the “2” and slide it in from the back. After these plastic clips were snapped I also needed to use a sharp pen knife to really remove all the remaining tiny bits of plastic where I had snapped them off. This might not seem great but I assure you when these sensors are in place there is no way they’re ever coming out. Here you can see I tried to get it in with one piece of the clip removed but it would not work.
View attachment 78721
With both bits removed and trimmed with a sharp knife, it was possible to push it through from the back.
View attachment 78722
You can see that with the rear clips remaining and the plastic bit where the wires are, in the central channel it’s not going anywhere. I then connected the wires and covered in tape as before.

After doing the two rear sensors I finished with the front one. Here you can see how much easier it is to move the hose out of the way.
View attachment 78725

This sensor wasn’t rusted but was covered with a white crystalline dust that suggested some corrosion or reaction. I cleaned this all away.
View attachment 78726

The final job before the plastic cover goes back on. Reasonably tidy and not that dissimilar to how it was.
View attachment 78727

I now made sure I hadn’t left any screwdrivers etc on the roof and reconnected the batteries.

(When I reconnected everything after replacing the first sensor, at the end of day one, there was a few worrying electrical shenanigans. The engine wouldn’t start first time; the control unit was flashing and wouldn’t give me the main menu until I set the clock; error 7001 came up which means loss of power. I think my ignition often doesn’t like starting until I’ve jiggled the steering wheel and engaged the steering lock. Eventually it started, but, as I said before, replacing the one sensor didn’t work. I plugged the van in overnight which cleared 7001.)

So after replacing the other 3 sensors and reconnecting the batteries I plugged in to the mains to make sure all was charged. I then went for a walk for an hour, contemplating success and failure. With it looking like it was about to rain I was forced into seeing if it had all worked. I think I had to set the clock again. I checked diagnostics but no errors this time. I turned the key and lowered the roof. The van made the usual 3 noises and the final locking one suddenly stopped. Like it should! The first time in months, it was back to normal. Success!! The roof down symbol was there.
View attachment 78728
I went for a drive to make sure the chimes wouldn’t reappear. They didn’t.
One odd quirk of the roof thinking it’s up, is that you can’t turn off the control module. I checked this and it turned off, so again, everything was back to normal.

So the sensors cost me €100 on eBay and I spent about £30 on some tools. The sensors are now £58.67 from bmwsupply.co.uk. I’ve just ordered another 4 as my van is a 2008 T5 and I can I imagine having to do this again sometime, ten years from now.
It took me 6 hours to replace the first sensor but an hour was lost borrowing a spline socket to remove the seat, it rained for an hour and several people wandered past and engaged me in conversation. The first attempt was quite fiddly and without the wire stripper, which was an absolute life-saver. The number 2 slot was great for stripping the very fine wire. The second day I replaced the other 3 sensors in 4 hours.

View attachment 78729
I’ve heard it suggested a VW roof loom costs £150-£250 just as a part. The labour charges could send this upto £3000, depending on the dealer.
If there was a great dealer near me, I would have ‘happily’ have paid them maybe £600-£1000 to fix this. I love our van and will always pay whatever to have it maintained properly. I wouldn’t however, want to pay a dealer £3000 to pull out the roof lining for no good reason and generally fumble about.
In all honesty I am still amazed I fixed it!
Sometimes you just have to have a go, its great when we win and on occasions when we don't, we learn. Thanks for documenting your adventure. I may need it at some point.
 
Well done @Lambeth Cali a great write up and clear photos, always worth having a go at repairing things yourself :)
 
Below is a picture of the rear sensor before I touched it.
View attachment 78720The blue arrow shows the front hose that is looped around the back of the hydraulic ram. This can be unclipped which makes it easy to twist the hose to replace the front sensors. You can see the rear hose directly above the rear sensor with “2” on it. Even removing this is difficult. You will probably destroy it getting it out. It was suggested to me that I didn’t want that hose pop out or bad things would happen. The good news is they seem to be securely fitted.
When I got it out and started to remove the electrical tape I found that this wiring was more complicated there was still two wires going to the sensor but there was connectors under the tape with two wires joining into one before going to the sensor. This meant a little care was needed about where I was going to make my join.
View attachment 78724

I cut the wire and put some tape around the first 10cm of the new sensor and cut and stripped the wires ready to connect.

It became clear that the only way I was going to be able to get the new sensor in, was to snap off the bits of plastic you can see above either side of the “2” and slide it in from the back. After these plastic clips were snapped I also needed to use a sharp pen knife to really remove all the remaining tiny bits of plastic where I had snapped them off. This might not seem great but I assure you when these sensors are in place there is no way they’re ever coming out. Here you can see I tried to get it in with one piece of the clip removed but it would not work.
View attachment 78721
With both bits removed and trimmed with a sharp knife, it was possible to push it through from the back.
View attachment 78722
You can see that with the rear clips remaining and the plastic bit where the wires are, in the central channel it’s not going anywhere. I then connected the wires and covered in tape as before.

After doing the two rear sensors I finished with the front one. Here you can see how much easier it is to move the hose out of the way.
View attachment 78725

This sensor wasn’t rusted but was covered with a white crystalline dust that suggested some corrosion or reaction. I cleaned this all away.
View attachment 78726

The final job before the plastic cover goes back on. Reasonably tidy and not that dissimilar to how it was.
View attachment 78727

I now made sure I hadn’t left any screwdrivers etc on the roof and reconnected the batteries.

(When I reconnected everything after replacing the first sensor, at the end of day one, there was a few worrying electrical shenanigans. The engine wouldn’t start first time; the control unit was flashing and wouldn’t give me the main menu until I set the clock; error 7001 came up which means loss of power. I think my ignition often doesn’t like starting until I’ve jiggled the steering wheel and engaged the steering lock. Eventually it started, but, as I said before, replacing the one sensor didn’t work. I plugged the van in overnight which cleared 7001.)

So after replacing the other 3 sensors and reconnecting the batteries I plugged in to the mains to make sure all was charged. I then went for a walk for an hour, contemplating success and failure. With it looking like it was about to rain I was forced into seeing if it had all worked. I think I had to set the clock again. I checked diagnostics but no errors this time. I turned the key and lowered the roof. The van made the usual 3 noises and the final locking one suddenly stopped. Like it should! The first time in months, it was back to normal. Success!! The roof down symbol was there.
View attachment 78728
I went for a drive to make sure the chimes wouldn’t reappear. They didn’t.
One odd quirk of the roof thinking it’s up, is that you can’t turn off the control module. I checked this and it turned off, so again, everything was back to normal.

So the sensors cost me €100 on eBay and I spent about £30 on some tools. The sensors are now £58.67 from bmwsupply.co.uk. I’ve just ordered another 4 as my van is a 2008 T5 and I can I imagine having to do this again sometime, ten years from now.
It took me 6 hours to replace the first sensor but an hour was lost borrowing a spline socket to remove the seat, it rained for an hour and several people wandered past and engaged me in conversation. The first attempt was quite fiddly and without the wire stripper, which was an absolute life-saver. The number 2 slot was great for stripping the very fine wire. The second day I replaced the other 3 sensors in 4 hours.

View attachment 78729
I’ve heard it suggested a VW roof loom costs £150-£250 just as a part. The labour charges could send this upto £3000, depending on the dealer.
If there was a great dealer near me, I would have ‘happily’ have paid them maybe £600-£1000 to fix this. I love our van and will always pay whatever to have it maintained properly. I wouldn’t however, want to pay a dealer £3000 to pull out the roof lining for no good reason and generally fumble about.
In all honesty I am still amazed I fixed it!
I meant to say the sensors are £12.18 each or £58.67 for 4 including delivery.
 
I meant to say the sensors are £12.18 each or £58.67 for 4 including delivery.
Even if they were £58 each still a massive saving over VW costs.
 
Brilliant. My van has just displayed all the above!
When ordering the parts via bmwsupply I input part number and it takes me to a choice of about 20 Cabrio’s. Which one did you order please?
secondly, my roof is down and won’t budge - how did you get it up and make it stay up?
many thanks. Pete
 
Check out as guest, you need to confirm the vehicle is a "1 Series", then "Convertible" and confirm it is a "12/07 to 10/13 (E88)" , you can either have it sent to a dealer that accept online orders (only a few do) or have it posted directly with an extra postage charge. £12.65 x2 plus £4.99 postage.
 
Check out as guest, you need to confirm the vehicle is a "1 Series", then "Convertible" and confirm it is a "12/07 to 10/13 (E88)" , you can either have it sent to a dealer that accept online orders (only a few do) or have it posted directly with an extra postage charge. £12.65 x2 plus £4.99 postage.
Thanks
 
Brilliant. My van has just displayed all the above!
When ordering the parts via bmwsupply I input part number and it takes me to a choice of about 20 Cabrio’s. Which one did you order please?
secondly, my roof is down and won’t budge - how did you get it up and make it stay up?
many thanks. Pete
Second issue, roof down won't budge - try checking the control panel and reset any faults (lots of threads on how to do this) or if that doesn't work you'll have to apply 12v to the pump motor, see thread below and a few below it - hope that helps.
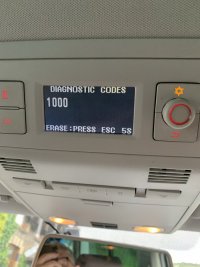
Post in thread 'Roof code 1000' https://vwcaliforniaclub.com/threads/roof-code-1000.34527/post-490538
 
Anyone know what this all means?
I cannot reset control panel to get roof up as it is stuck down.

12876BA7-1889-4D80-B767-969571682425.jpeg

63D737EC-6BA6-4BC8-B756-C5A0353D80B1.jpeg

CD31AEC0-A4F9-4466-9E27-93FEC93D7B06.jpeg
 
Code 1000 is typical on roof sensor failures, try to reset the fault using the bottom right button, with arrow on, holding it pressed down for 5 secs.
If it doesn't clear the fault you may have to take the control panel out to access the roof pump motor and apply 12v directly to the motor connector to open the roof and repair the sensors as described in my previous link.
 
Are you aware your fridge is on :)
 
I am. We are away visiting my daughter in Cornwall so it’s 4 nights under a closed roof! Booked chiropractor in readiness for our return and then I’ll give it all a go - sensors ordered Thanks for your help.
Yes the 1000 code is same as me and it isn’t possible the turn off the control panel when it thinks the roof is up. I did manage to clear the 1000 code as the others described. Weirdly my roof always went up and down ok which was different to other experiences.
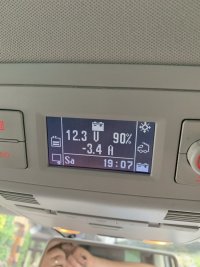
I think plugging my van in overnight might have been part of the clearing the 1000 code. I think it applies to the roof and also the battery charge. Having the control model on for 6 months I think ran down my batteries.
Good luck!
 
Last edited:
Brilliant. My van has just displayed all the above!
When ordering the parts via bmwsupply I input part number and it takes me to a choice of about 20 Cabrio’s. Which one did you order please?
secondly, my roof is down and won’t budge - how did you get it up and make it stay up?
many thanks. Pete
Just make sure you get the ones with the correct part number.
 
Just make sure you get the ones with the correct part number.
I have ordered same part number as you.
managed to get a reset and raise the roof today. Checked the sensors and they all look good as new - I was semi hoping I could see a bit of deterioration! Managed to get roof down in stages.
 
I have ordered same part number as you.
managed to get a reset and raise the roof today. Checked the sensors and they all look good as new - I was semi hoping I could see a bit of deterioration! Managed to get roof down in stages.
Great.
One of mine was visibly rusted the other 3 looked fine but it took replacing all 4 to fix things. Same for other people I think. By the way how old is your van?
Good luck.
 
Last edited:
Great.
One of mine was visibly rusted the other looked fine but it took replacing all 4 to fix things. Same for other people I think. By the way how old is your van?
Good luck.
Hi. Mines a 2012 SE.
Had no noises or hints until last week when trying it after a good clean. Wouldn’t budge, roof open on control panel and bongs until you get above 20mph!

Your account has given me the confidence. Got all the tools needed so I feel even if I cock up its only cost me the price of the sensors.
 
I wonder if it is possible to isolate the faulty sensor somehow by putting a piece of iron (hammer head?) near each sensor in turn to see if the control panel changes its mind as to the fault.

What I don't know is how often it checks and what is exactly "normal". As I understand it the sensor detects the variation in the magnetic field caused by a nearby iron object so the sensor should have one reading when the piston is near and another when not. I haven't had time to pop my roof and think it out but in theory if it thinks the roof is open, it sounds like one of the sensors that would be by the ram when the roof is closed isn't detecting the metal of the ram.
In theory Yes, but if all 4 have to work then all 4 would have to be triggered and I can't work out how you could identify the failed one.
 

Similar threads

Back
Top